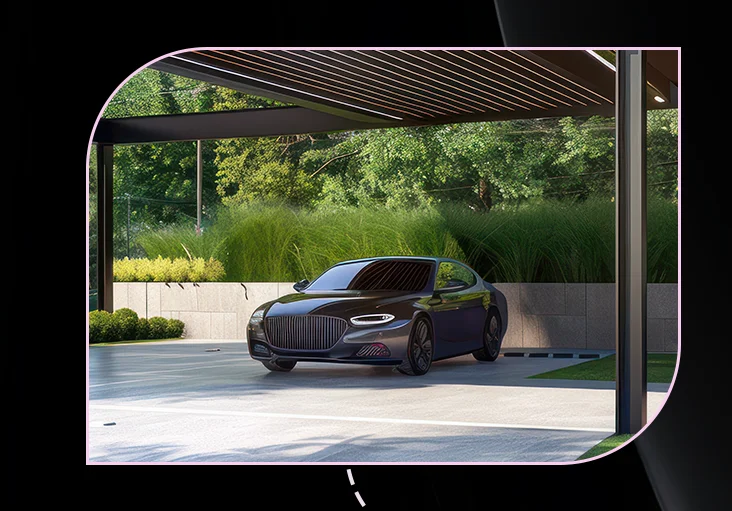
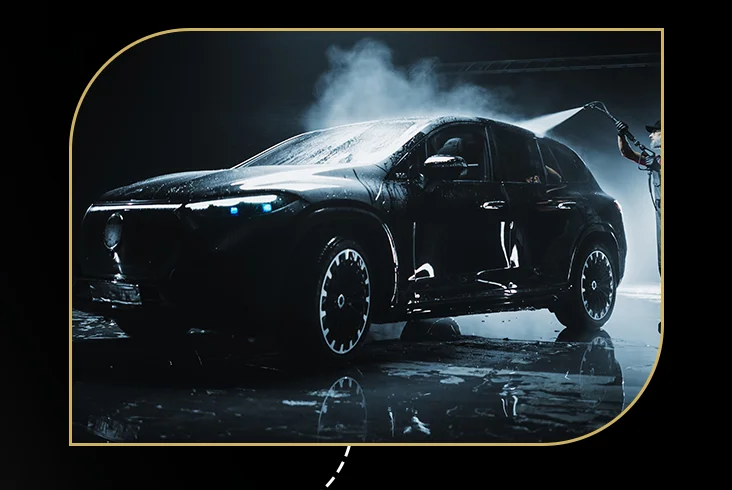
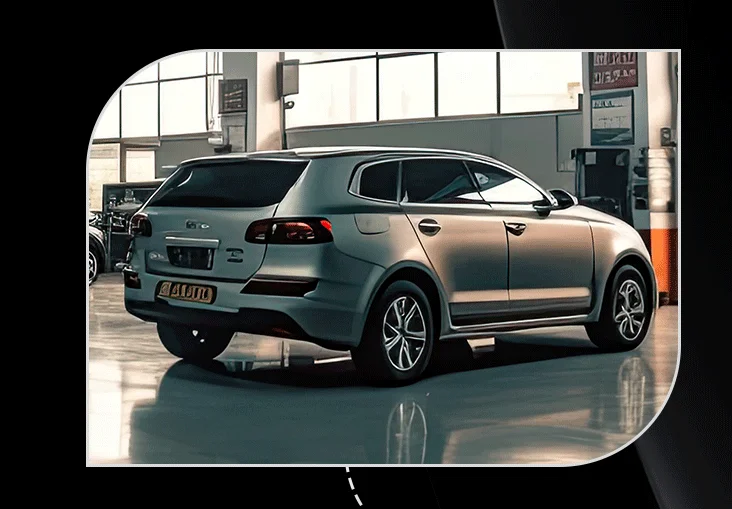
Prepare the Environment:
Park your car in a shaded, dust-free area with a surface temperature between 15°C and 24°C (60°F–75°F).
Ensure you have access to a hose and water for rinsing after application.

Prepare the Environment:
Park your car in a shaded, dust-free area with a surface temperature between 15°C and 24°C (60°F–75°F).
Ensure you have access to a hose and water for rinsing after application.
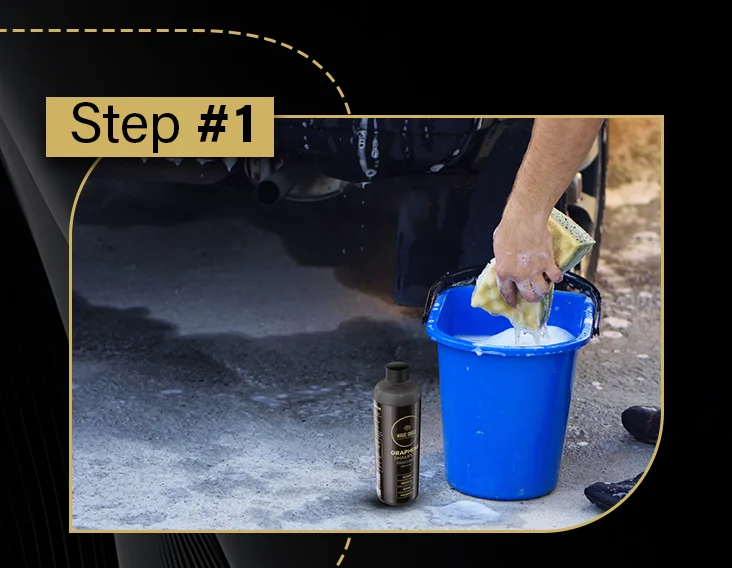
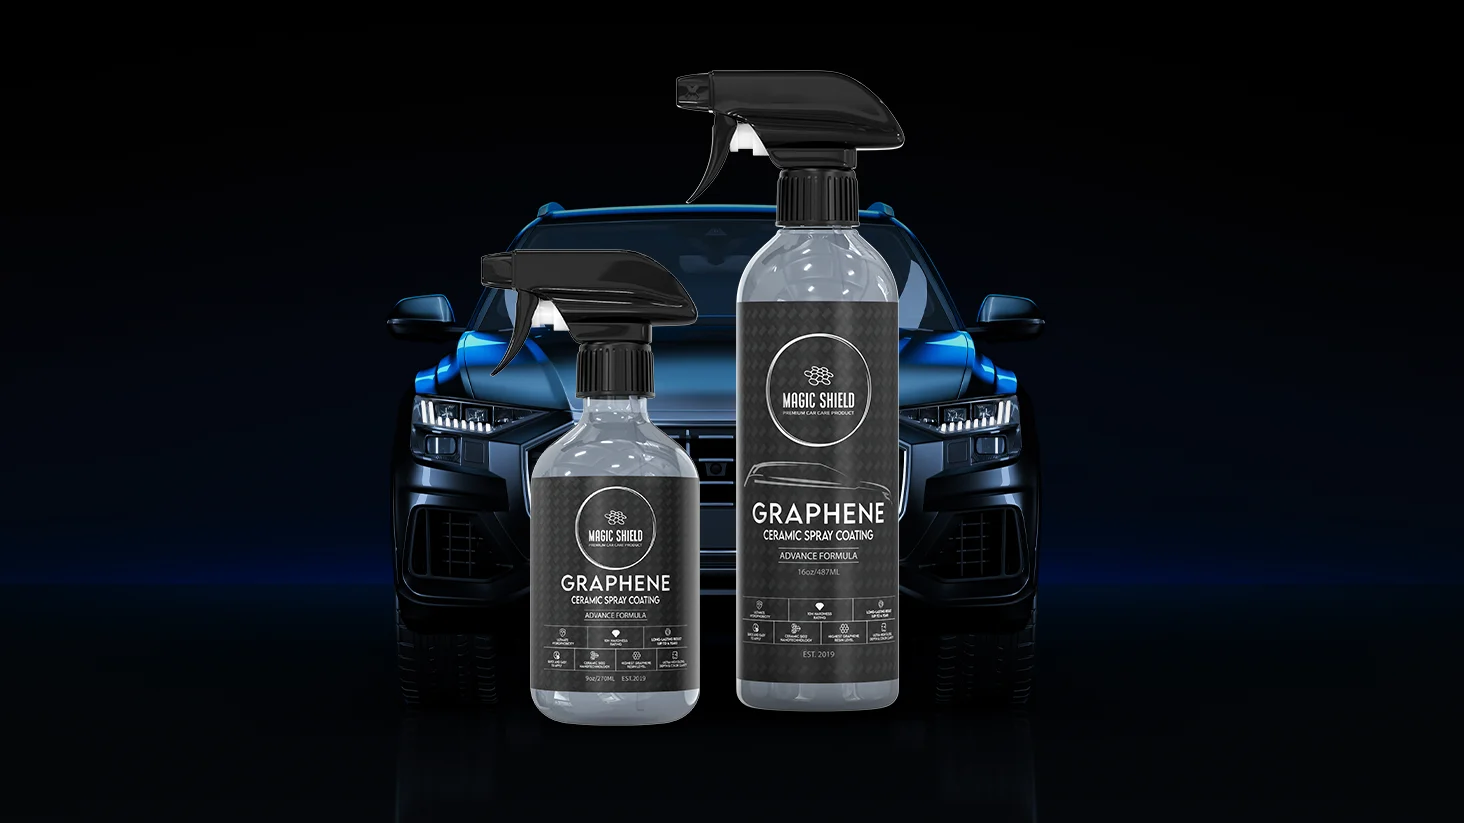
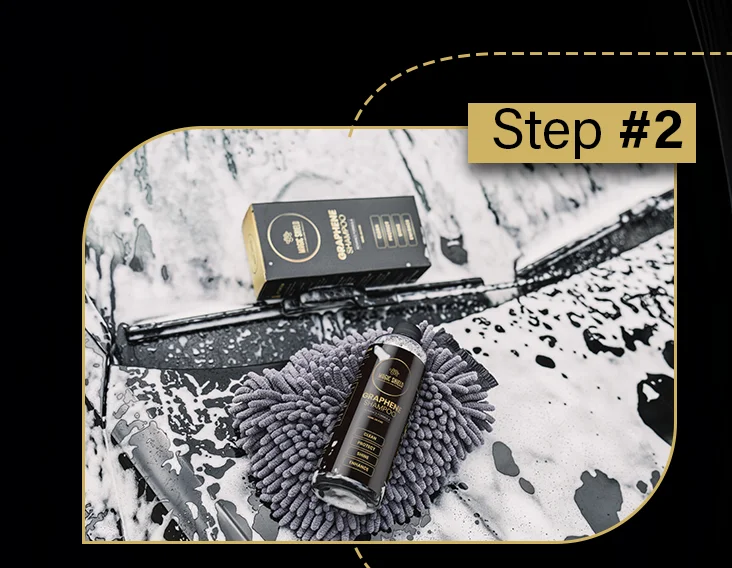
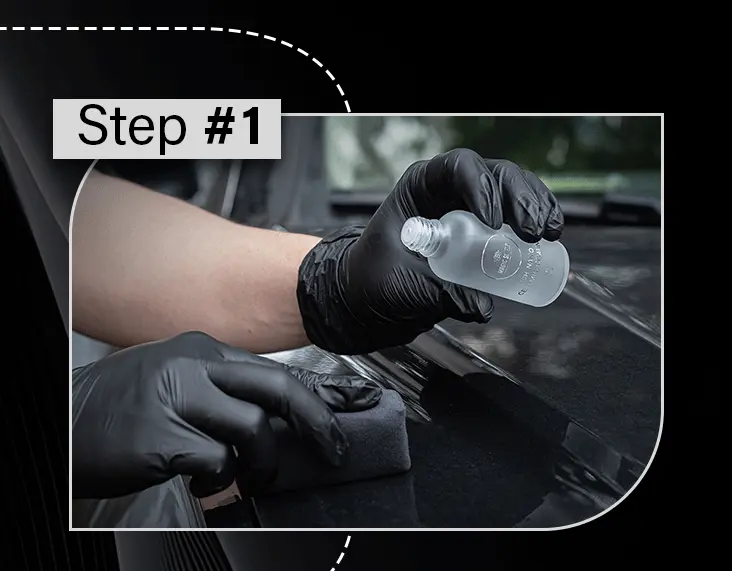
DILUTION
Mix 30ml (1 oz) of shampoo with 4 liters (1 gallon) of water in a clean wash bucket.
Stir gently to activate the rich foam and release the graphene-infused hydrophobic agents.
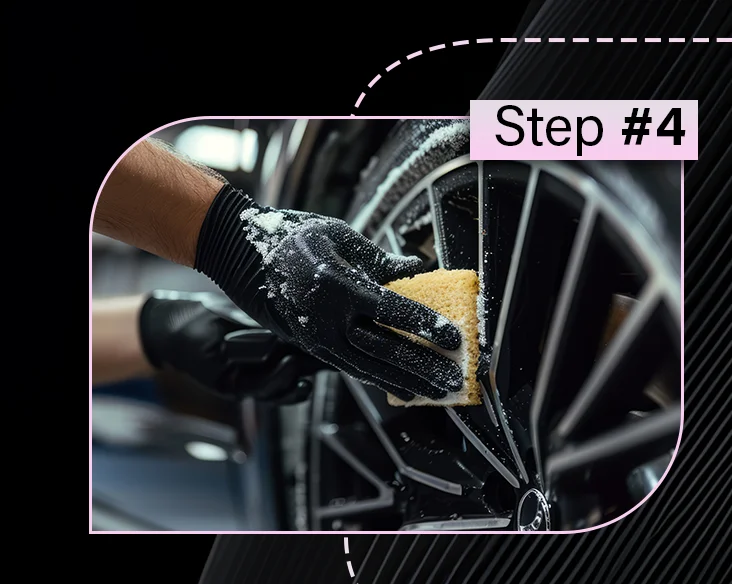
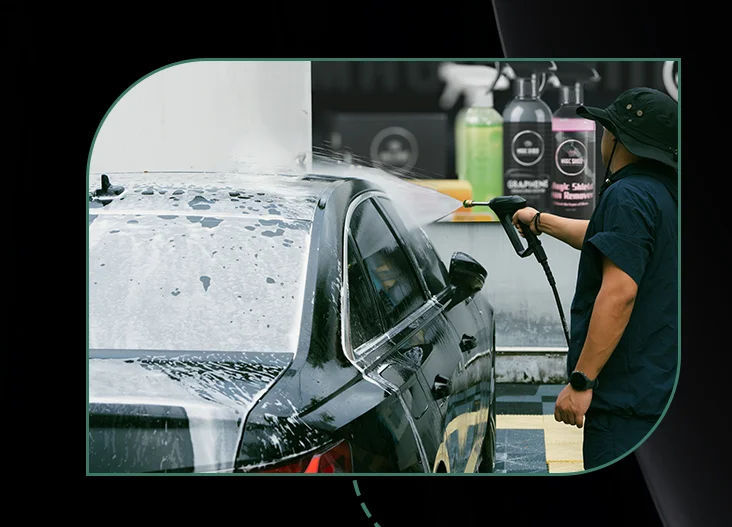
APPLICATION
Using a clean wash mitt, sponge, or foam applicator, dip into the shampoo solution.
Start cleaning from the top of the vehicle (roof and glass) and work your way downward to avoid dragging dirt to cleaner surfaces.

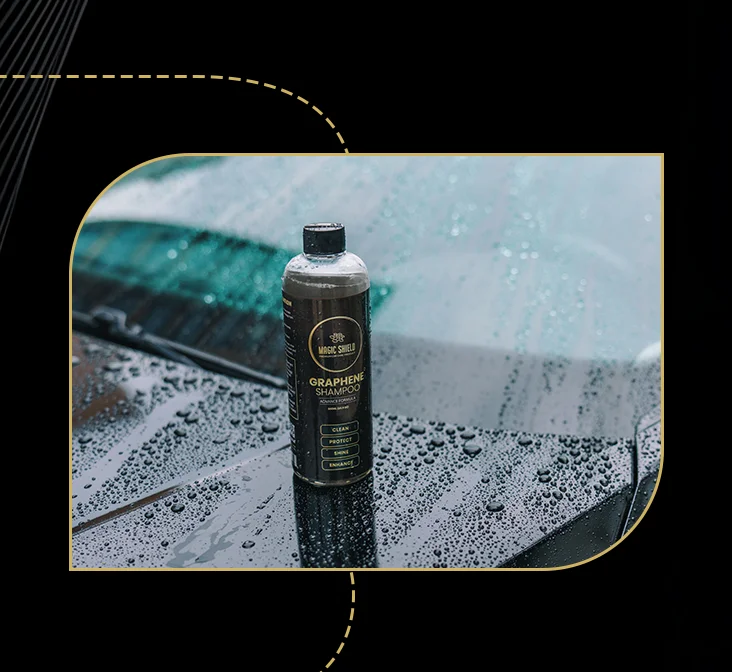
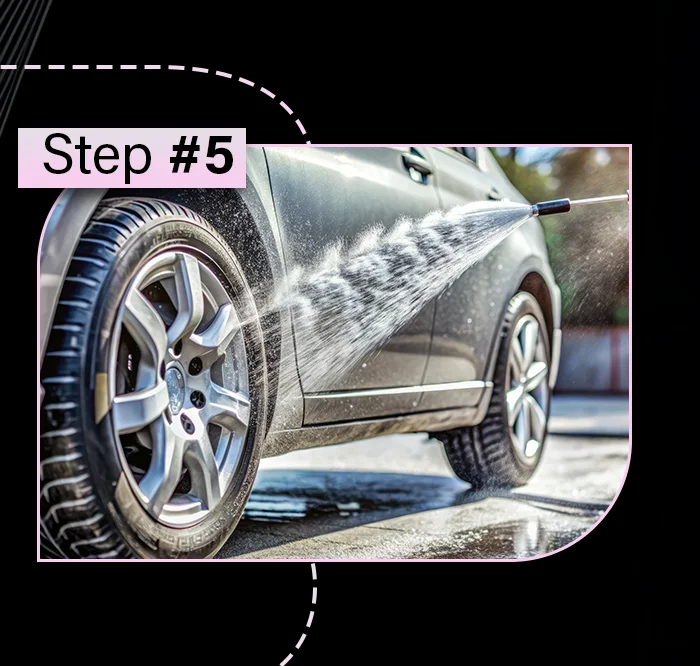
RINSING
Rinse thoroughly with clean, high-pressure water.
Ensure no shampoo residue remains, especially around mirrors, grilles, and emblems.
The pH-neutral formula will not strip existing waxes or coatings but should still be removed completely for the best finish.
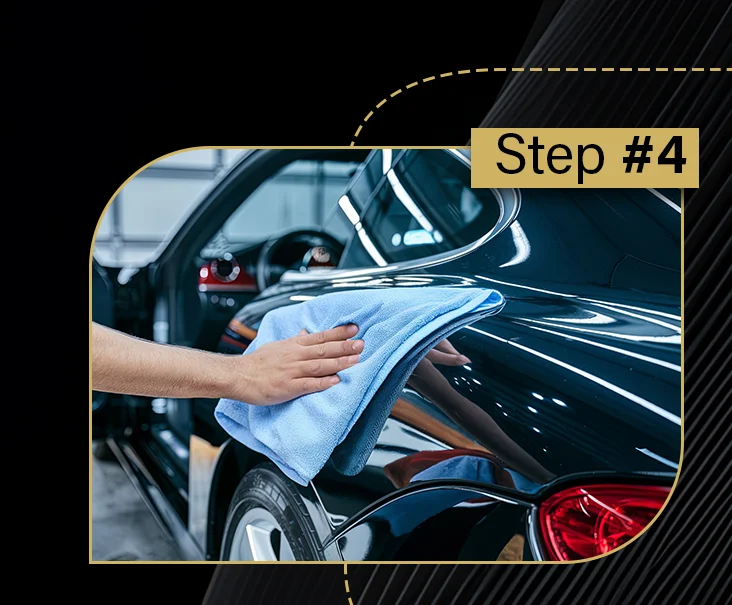
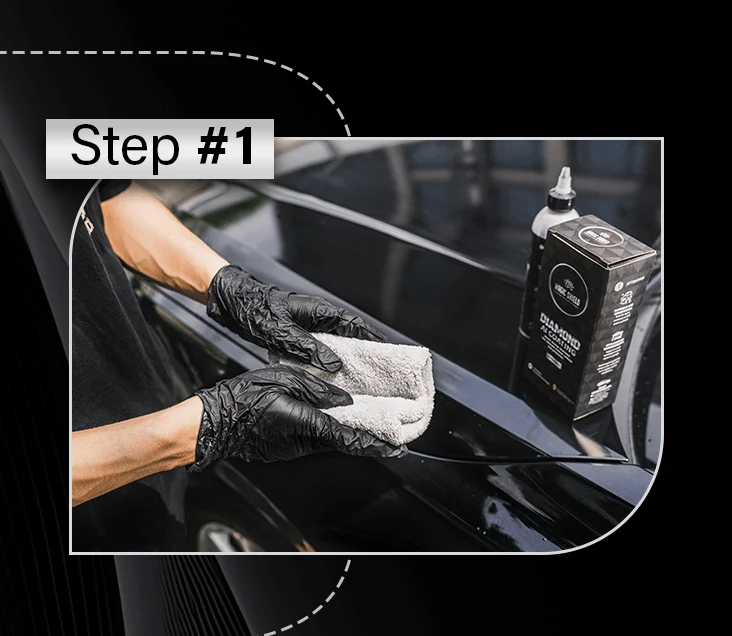
DRYING
Dry the vehicle immediately using a clean, high-absorbency microfiber towel or an automotive dryer/blower.
Work panel by panel, and do not let water air dry, especially under the sun.
The shampoo’s graphene and SiO₂ technology will leave a slick, streak-free, hydrophobic surface that repels dust and water.
TIPS FOR BEST RESULTS
Avoid direct sunlight during washing, as it may cause soap to dry too quickly, leaving streaks.
Use the two-bucket method (one for soap, one for rinse) to reduce swirl marks.
Wash and dry your microfiber towels separately and avoid fabric softeners.

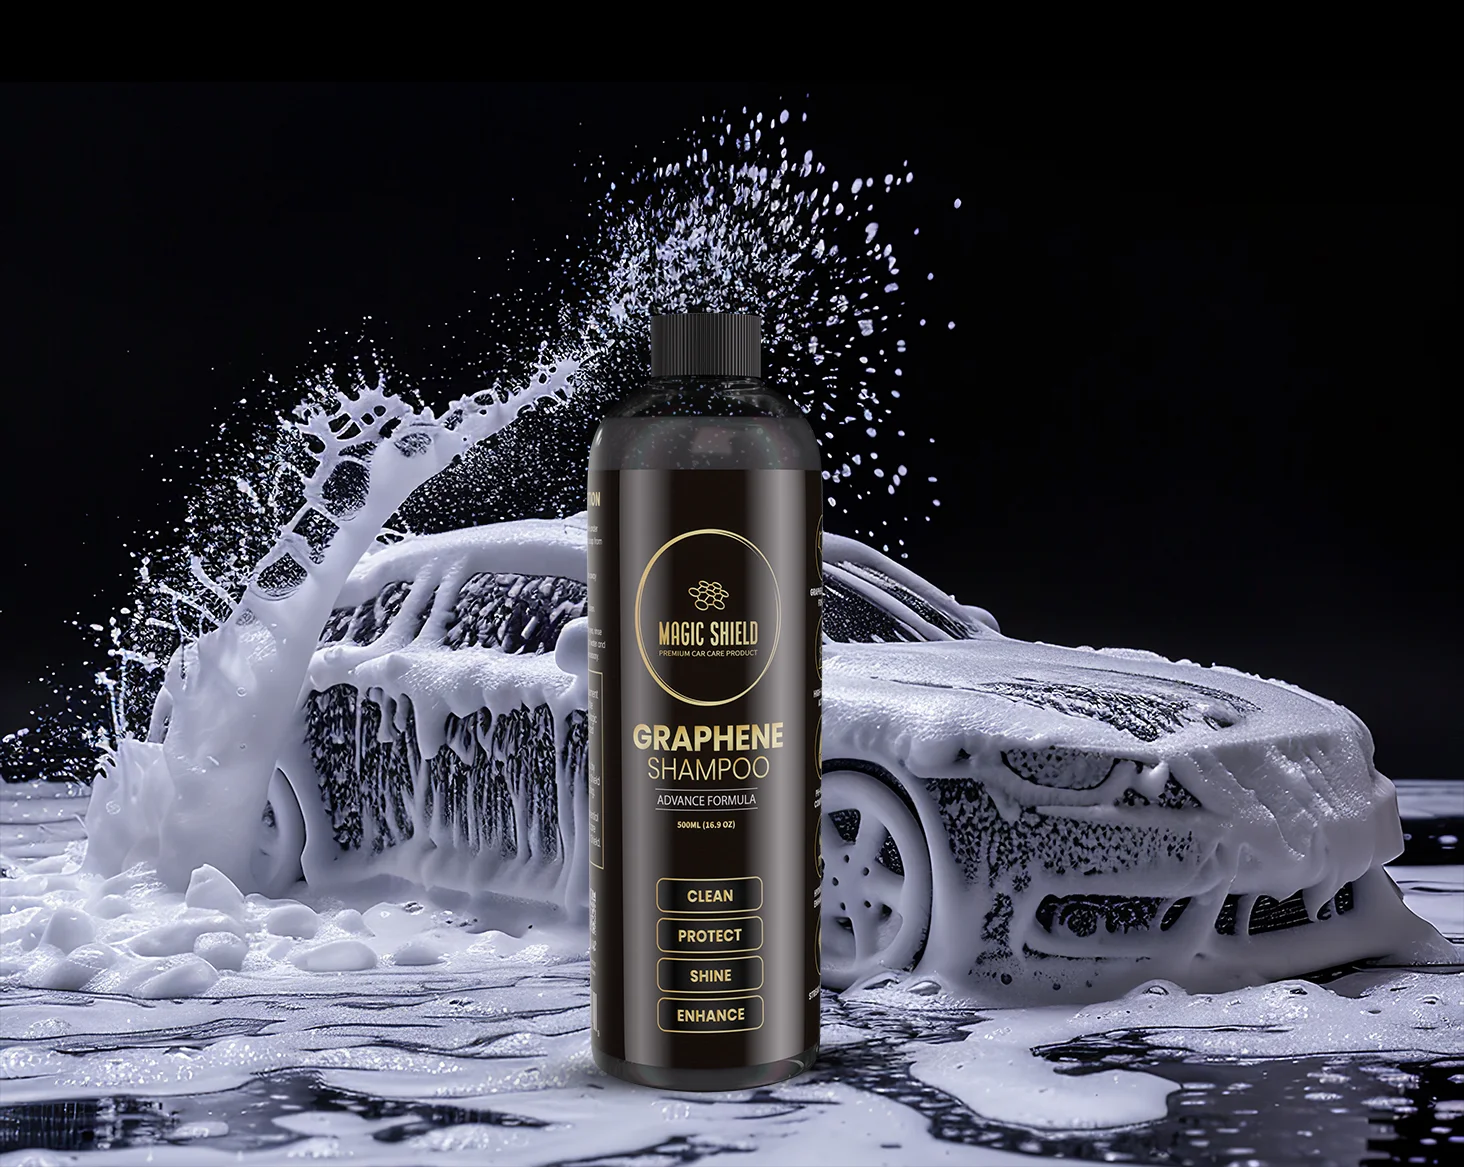
WHAT MAKES IT SPECIAL?
Graphene-Infused Formula: Boosts surface protection, increases durability, and enhances shine.
pH-Neutral Composition: Safe for all vehicle finishes, coatings, waxes, and wraps.
Hydrophobic Finish: Promotes water beading and keeps your car cleaner for longer.
High Foaming Action: Traps and lifts dirt for safer, more effective cleaning.

BEFORE YOU BEGIN:
Park in a shaded area (15ºC–24ºC).
Prepare the vehicle by thoroughly washing it and removing all previous wax, grease, and contaminants. This chemical can be smelling, please work on ventilate area.
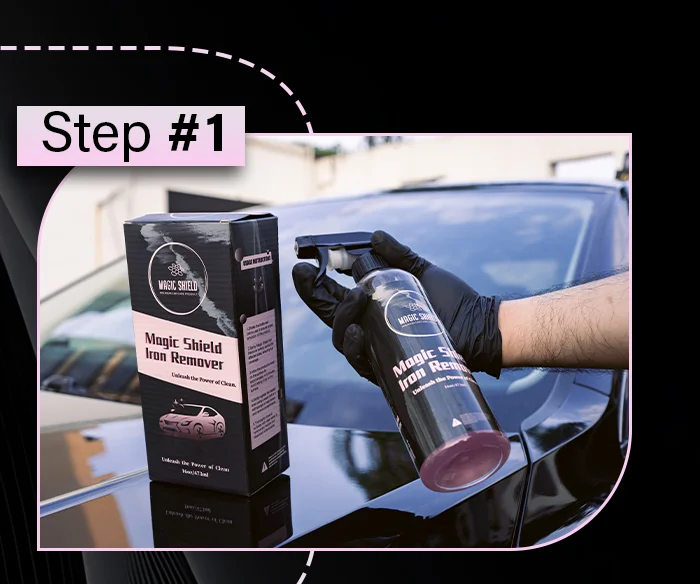
SHAKE AND PREPARE
Shake the bottle well before use to ensure proper mixing of the product.
Give spray head a simple twist to change spray modes effortlessly.
SPRAY THE PRODUCT EVENLY
Hold the bottle 6–8 inches away and spray a generous, even layer over the target area.
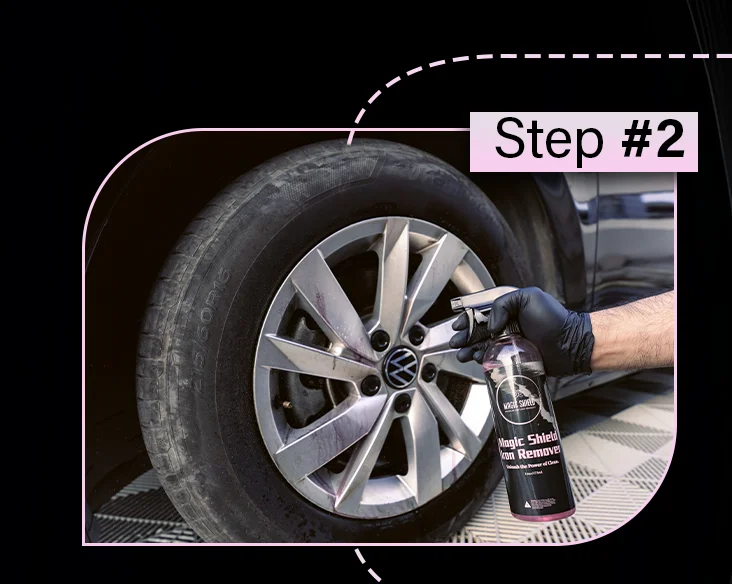
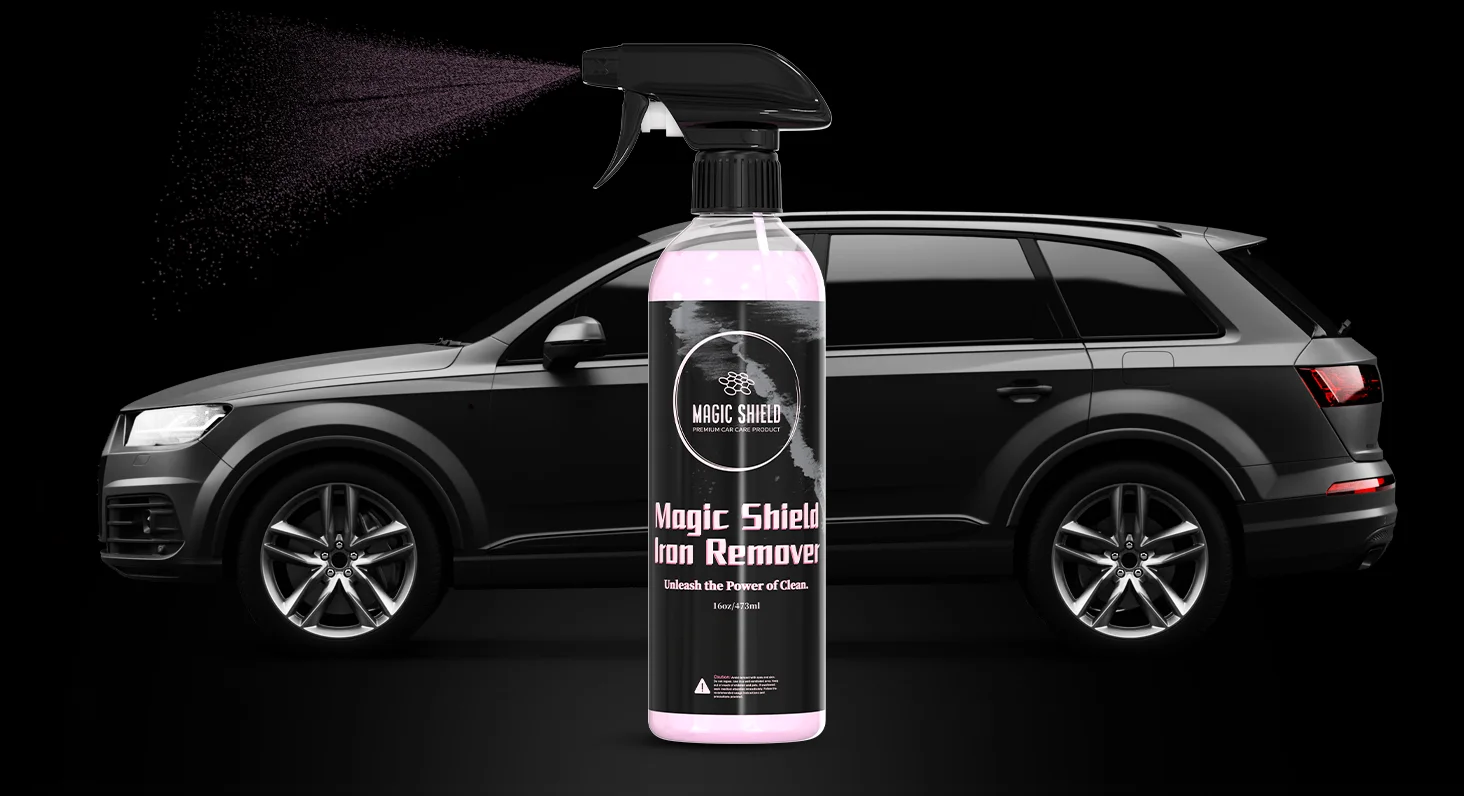
Focus on High-Contamination Areas: Pay extra attention to areas like wheels and lower body panels where iron particles tend to accumulate.
LET IT DWELL
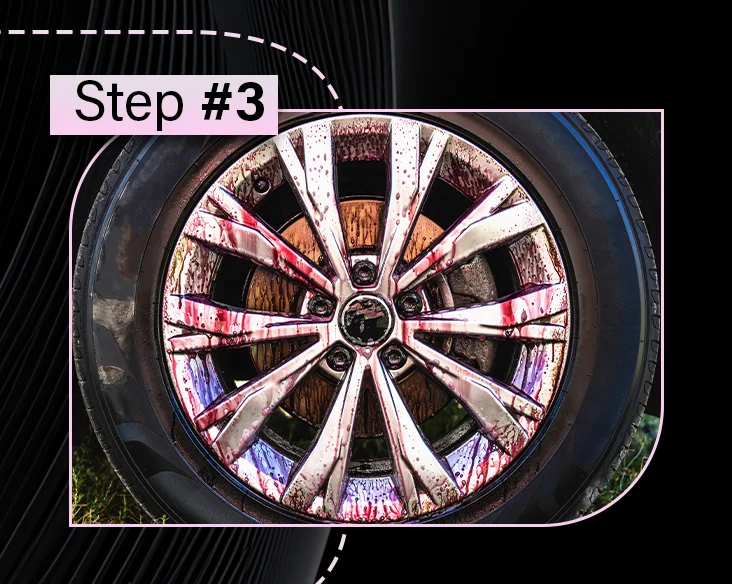
Let the spray sit for 3–5 minutes until it changes color (purple/red).
Ensure the product stays wet during this time to avoid streaking or staining.
Gently Scrub Contaminated Areas
Use a soft sponge for heavily contaminated areas.
Gently agitate the treated area using a wash mitt or a soft sponge to help loosen and remove contaminants.
Wash with Clean Water
Use High-Pressure Water: Rinse the treated area thoroughly with a hose or pressure washer to remove all traces of the iron remover and dissolved contaminants.
Clean Any Residue: If desired, perform a final wash using car shampoo to ensure no residue is left behind.
Inspect the surface: Inspect the surface for remaining iron deposits. Re-apply the spray and repeat the process if necessary.
Tips for Best Results
Apply the iron remover every 2-3 months or as needed to maintain a contaminant-free surface.
Avoid applying the spray to hot surfaces or under direct sunlight.


BEFORE YOU BEGIN:
Ensure you’ve completed an iron removal treatment to eliminate embedded contaminants and prepare the surface for claying.
Park your car in a shaded, dust-free area with a surface temperature between 15°C and 24°C (60°F–75°F).
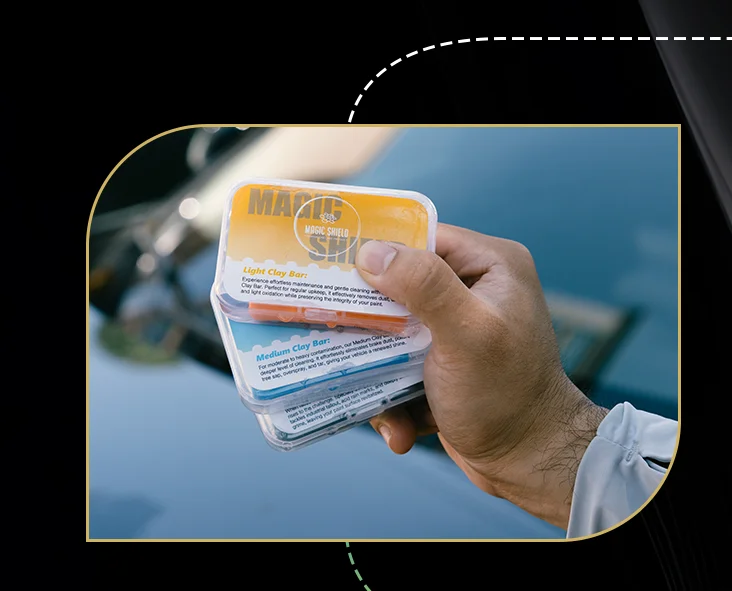
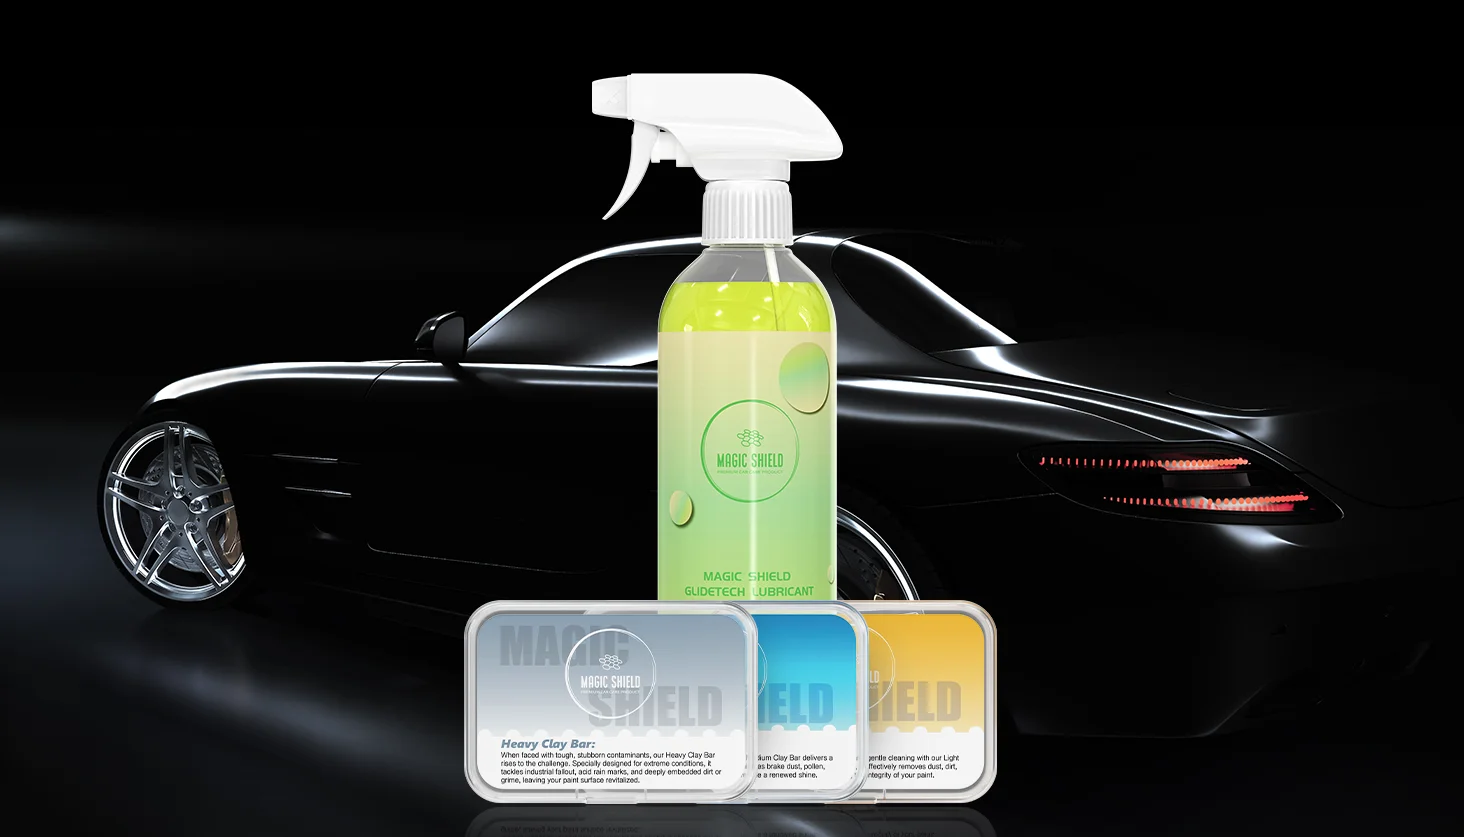
SELECT THE RIGHT CLAY:
Light Clay: For cars less than 1 year old or recently clayed within the past year.
Medium Clay: For cars 2–3 years old with moderate contamination.
Heavy Clay: For cars older than 3 years or with heavy contamination and visible roughness.
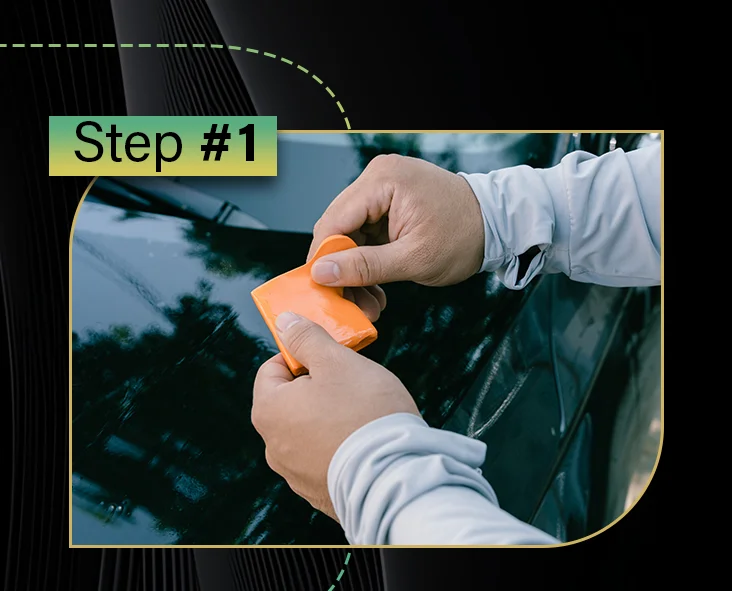
PREPARE THE CLAY BAR
Unwrap the Clay Bar: Remove the clay from its packaging.
Knead the Clay: Flatten and knead the clay into a disc-like shape (about the size of your palm). This ensures even pressure during application.
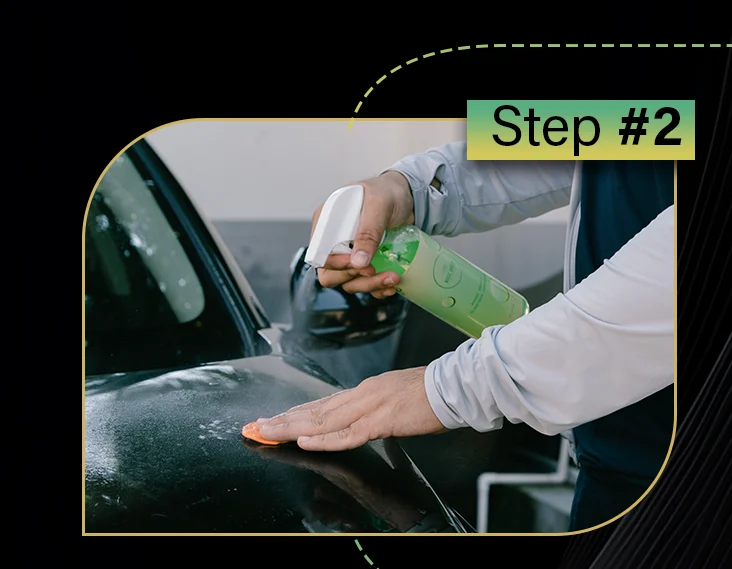
LUBRICATE THE SURFACE
Apply Lubricant Generously: Spray a clay lubricant or quick detailer onto a small section of the surface (e.g., 25% of the hood).
Key Tip: Lubrication prevents the clay from sticking to or scratching the paint.
GLIDE THE CLAY BAR OVER THE SURFACE
Apply Light Pressure: Hold the clay bar flat in your palm and gently glide it back and forth over the lubricated surface.
Feel for Resistance: The clay will pick up embedded contaminants. Resistance will reduce as the surface becomes smoother.
BUFF THE SURFACE
Rinse with Water: Thoroughly rinse the treated area with clean water.
Remove Residue: Use a clean microfiber towel to wipe off and dry the surface.
Inspect Thoroughly: Check each panel from multiple angles to ensure a smooth and even finish.
FINAL INSPECTION
Using a clean wash mitt, sponge, or foam applicator, dip into the shampoo solution.
Start cleaning from the top of the vehicle (roof and glass) and work your way downward to avoid dragging dirt to cleaner surfaces.
TIPS FOR BEST RESULTS
Always use plenty of lubricant — never clay a dry surface to avoid scratches.
Replace the clay bar if it becomes too dirty or worn to prevent reintroducing contaminants.
Follow up with polishing to refine the surface and achieve a flawless finish.

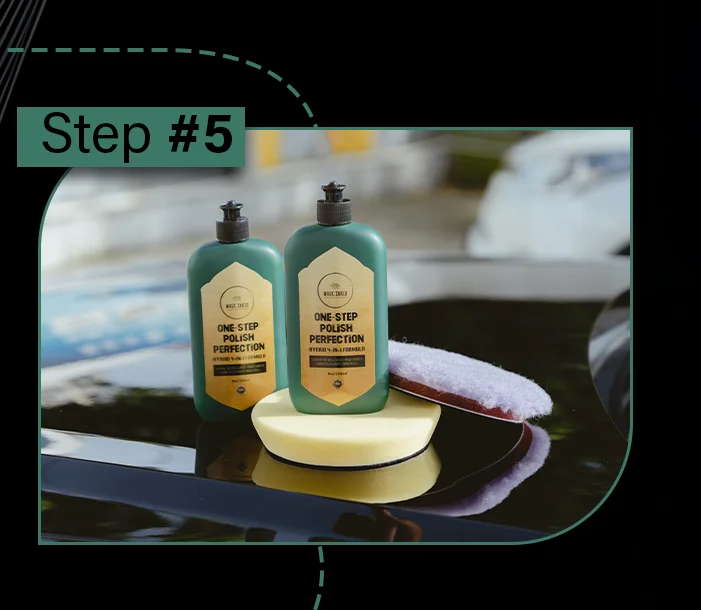
BEFORE YOU BEGIN:
Complete Preparation: Ensure the surface has undergone iron removal and clay bar treatment. This prevents debris from being polished into the paint, which could cause scratches or imperfections.
Ideal Environment: Park your car in a shaded, dust-free area with a surface temperature between 15°C and 24°C (60°F–75°F).
Clean the Surface: Wash the vehicle thoroughly and dry it completely to remove dirt, grease, and contaminants.
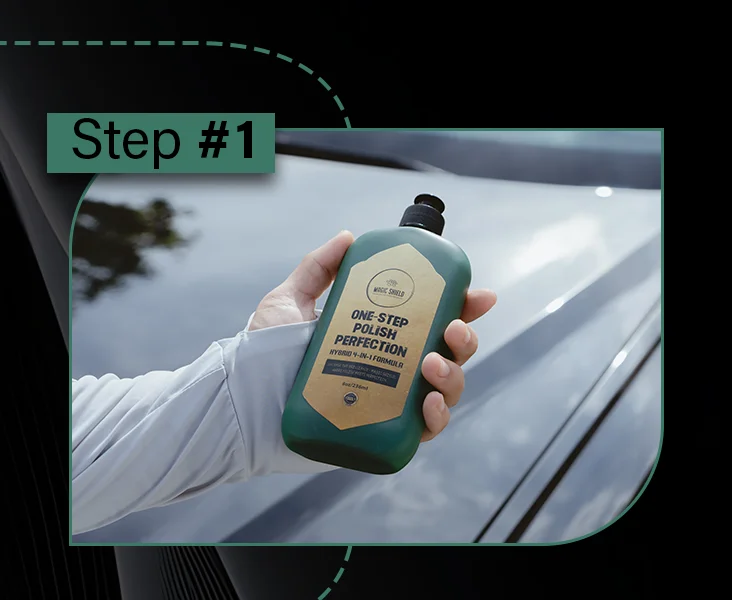
PREPARE THE APPLICATOR
Shake the Polish: Shake the bottle of One-Step Polish to ensure the formula is thoroughly mixed.
Choose the Right Pad: Use a polishing pad for light corrections. Use a cutting pad for deeper imperfections.
Focus on One Section at a Time: Work on smaller areas, such as half a hood or a single door panel, to ensure uniform results.

APPLY ONE STEP POLISH
Using a Machine: Apply a small amount of polish to a foam applicator pad attached to your polishing machine.
By Hand: Apply a small amount of polish to a foam applicator pad and spread evenly.
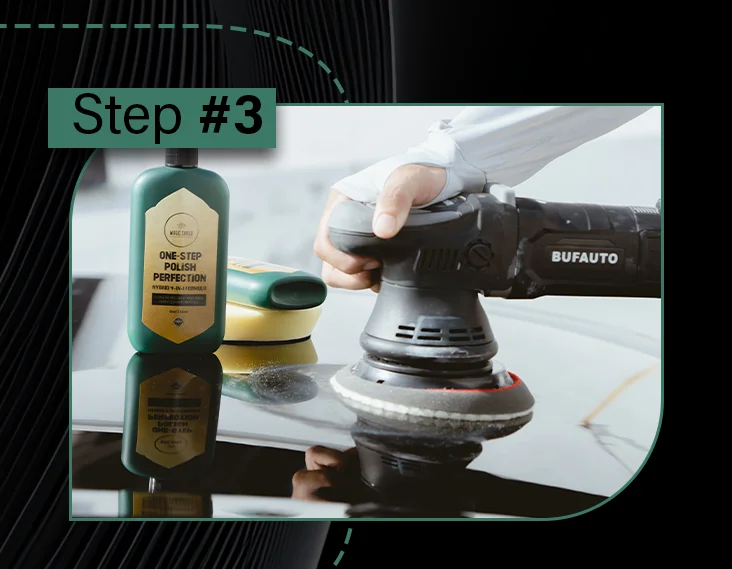
START POLISHING
Spread the Polish: Spread the polish evenly across the section before turning on the polisher or starting by hand.
Machine Speed: Set your dual-action polisher to a low speed (around 2–3) to spread the polish. Gradually increase the speed to medium (around 4–5) for actual polishing.
Use Overlapping Passes: Ensure even coverage and proper correction.
BUFF THE SURFACE
Remove Residue: Use a clean microfiber towel to buff away the rainbow haze.
Work Thoroughly: Avoid leaving excess polish on the surface.
Inspect the Surface: Use a good light source to check for uniformity and smoothness.
OPTIONAL FINISHING STEPS
Inspect for Consistency: Look for remaining imperfections. Reapply polish to any uneven areas if needed.
Seal the Shine: After polishing, use a prep spray to remove any polish residue. This ensures the surface is ready for a graphene or ceramic coating, creating the best bond and long-lasting protection.
TIPS FOR BEST RESULTS:
Always work in a well-ventilated area.
Choose the Right Pad: Use a polishing pad for light corrections or a cutting pad for deeper imperfections.
Avoid Heat: Do not apply polish to hot surfaces or under direct sunlight.
Follow Up with Coating: After polishing, apply a graphene or ceramic coating for long-term protection and a flawless finish.

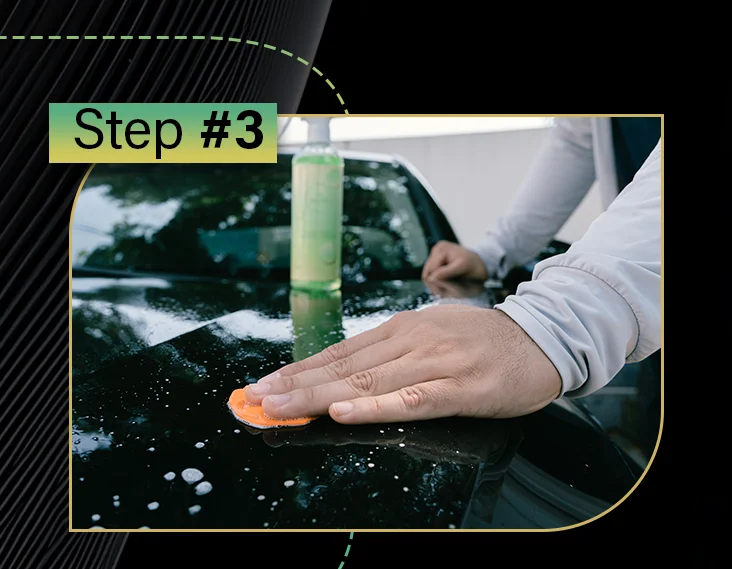
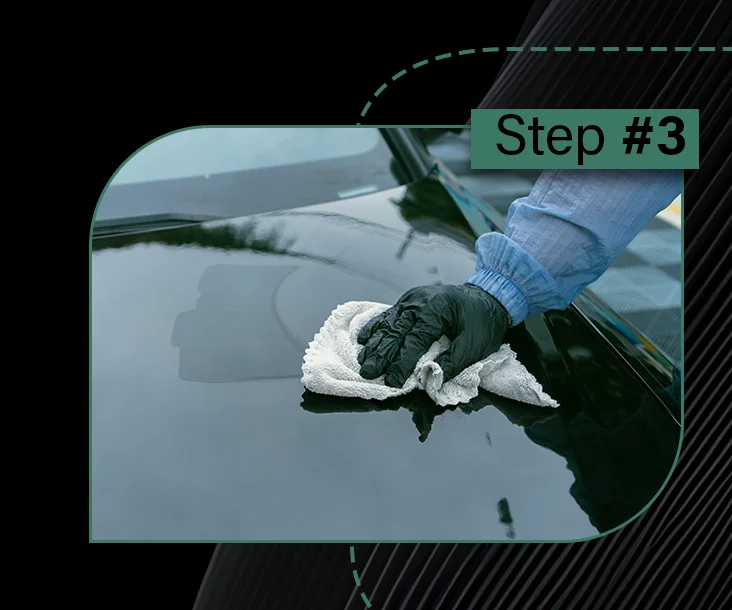
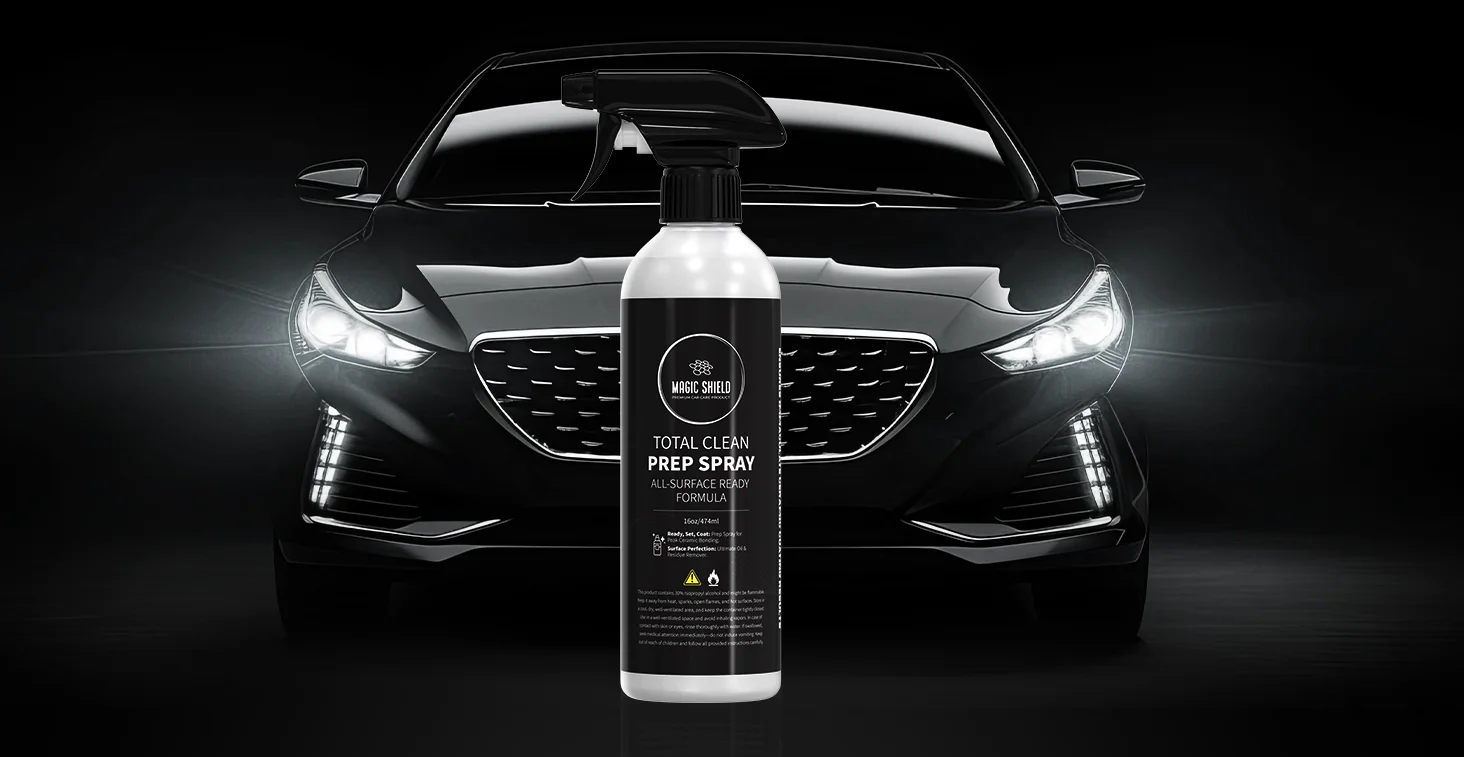
BEFORE YOU BEGIN:
Prepare the Environment:
Park your car in a shaded, dust-free area with a surface temperature between 15°C and 24°C (60°F–75°F).
Ensure you have access to a hose and water for rinsing after application.
Clean the Vehicle:
Wash the car thoroughly before applying the Prep Spray. This ensures the surface is free of dirt and contaminants.
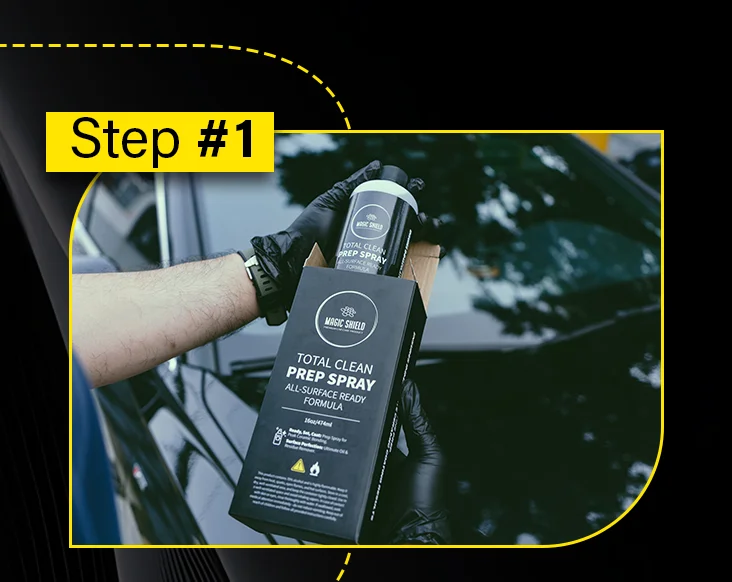
PREPARE THE APPLICATOR
Shake the bottle of Prep Spray well to ensure the formula is evenly blended.
Ensure the surface is cool to the touch before starting.
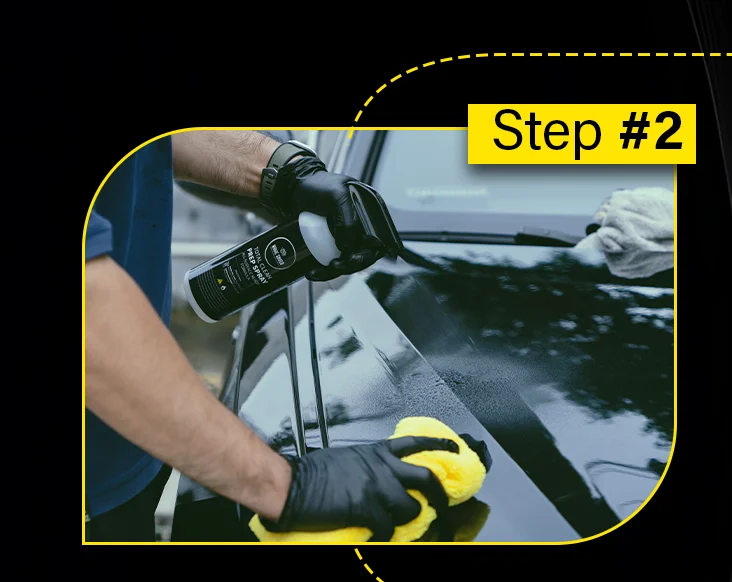
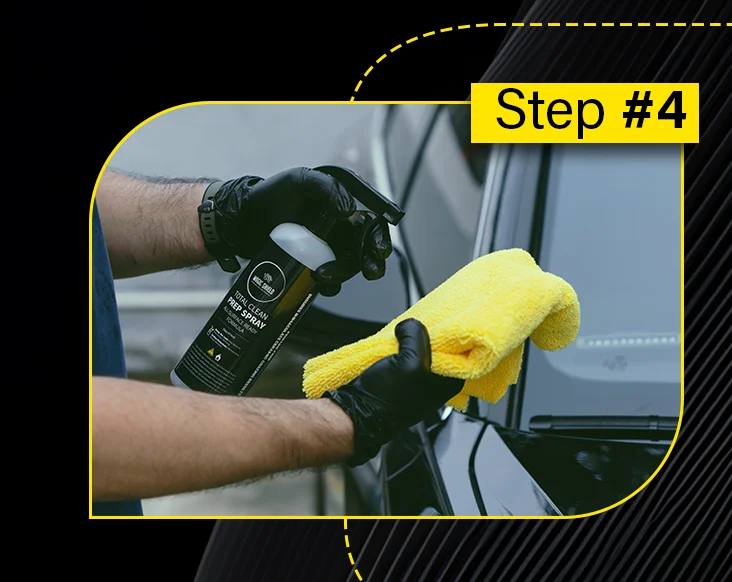
APPLY THE PREP SPRAY
Hold the bottle 6–8 inches away from the surface and spray a light, even coat on the target area.
Work in Sections: Focus on small sections (e.g., half of hood or one door panel) to ensure thorough coverage and ease of buffing.
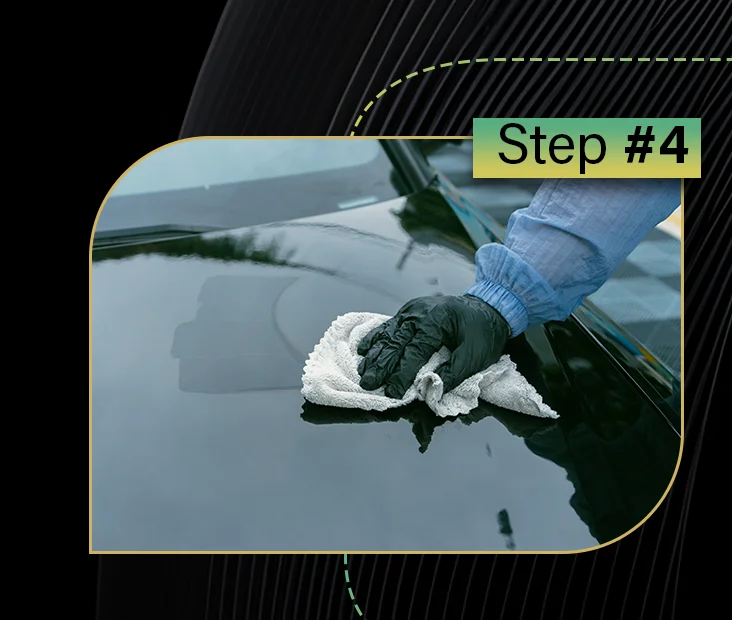
BUFF THE SURFACE IMMEDIATELY
Spread Evenly: Use a clean microfiber towel to spread the spray across the surface.
Buff Off Residue: Flip the towel to a dry side and buff the area until it is streak-free.
Important: Buff and rinse the treated area within 15 minutes to prevent residue from drying on the surface.
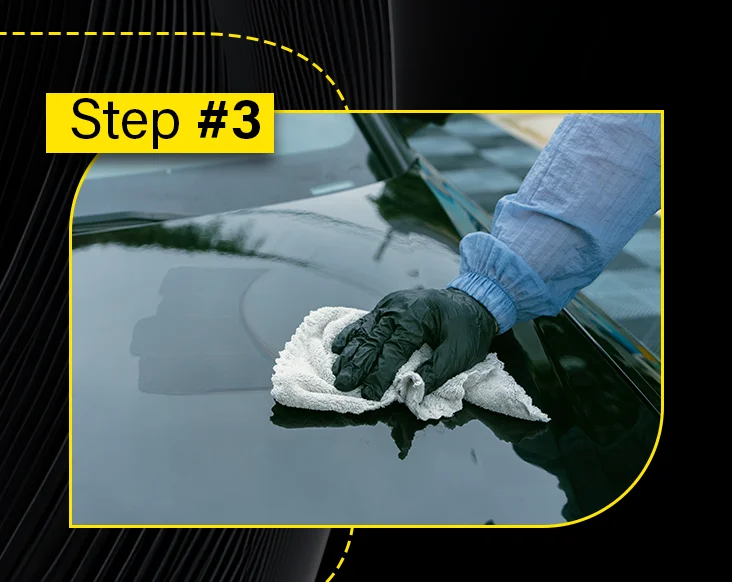
RINSE AND CLEAN
Rinse the entire treated area thoroughly with clean water after buffing.
Final Wash: A final wash ensures the surface is completely clean and ready for ceramic coating.

READY FOR COATING
Once the surface is clean and fully prepped, proceed with the ceramic coating application.
Apply the coating in a controlled, dust-free environment for best results.
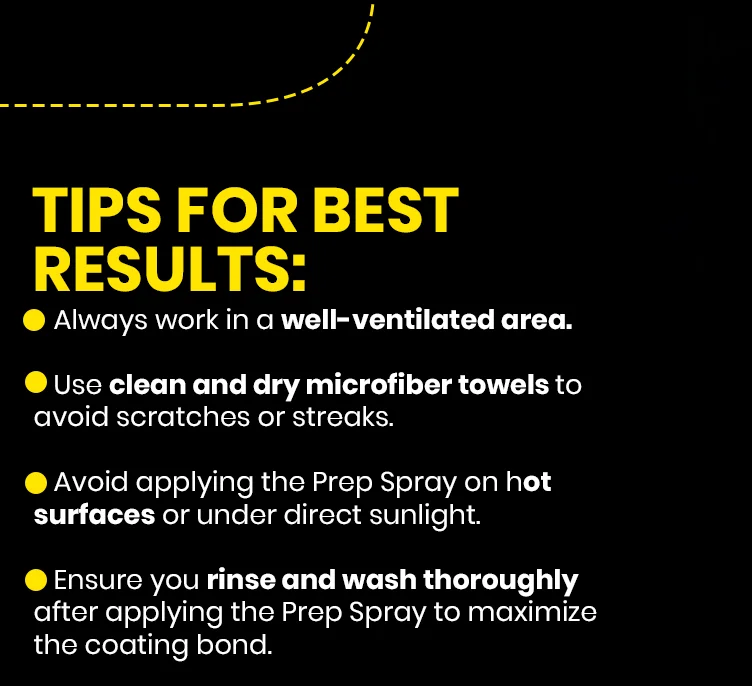
TIPS FOR BEST RESULTS:
Always work in a well-ventilated area.
Use clean and dry microfiber towels to avoid scratches or streaks.
Avoid applying the Prep Spray on hot surfaces or under direct sunlight.
Ensure you rinse and wash thoroughly after applying the Prep Spray to maximize the coating bond.
BEFORE YOU BEGIN:
Complete Preparation: Ensure the surface has undergone iron removal and clay bar treatment. This prevents debris from being polished into the paint, which could cause scratches or imperfections.
Ideal Environment: Park your car in a shaded, dust-free area with a surface temperature between 15°C and 24°C (60°F–75°F).
Clean the Surface: Wash the vehicle thoroughly and dry it completely to remove dirt, grease, and contaminants.
PREPARE THE APPLICATOR
Shake the Polish: Shake the bottle of One-Step Polish to ensure the formula is thoroughly mixed.
Choose the Right Pad: Use a polishing pad for light corrections. Use a cutting pad for deeper imperfections.
Focus on One Section at a Time: Work on smaller areas, such as half a hood or a single door panel, to ensure uniform results.
APPLY ONE STEP POLISH
Using a Machine: Apply a small amount of polish to a foam applicator pad attached to your polishing machine.
By Hand: Apply a small amount of polish to a foam applicator pad and spread evenly.
START POLISHING
Spread the Polish: Spread the polish evenly across the section before turning on the polisher or starting by hand.
Machine Speed: Set your dual-action polisher to a low speed (around 2–3) to spread the polish. Gradually increase the speed to medium (around 4–5) for actual polishing.
Use Overlapping Passes: Ensure even coverage and proper correction.

Before You Begin
Prepare the Environment:
Work your car in a shaded, dust-free area with surface temperature between 15°C and 24°C (60°F–75°F).
Ensure you have access to a hose and water for rinsing after application.
Clean the Vehicle:
This removes large dirt, dust, mud, bird droppings, and road grime, preventing scratches and swirls.
Preparation
Thoroughly clean the vehicle’s painted surface using a deep wash.
Use a prep spray or degreaser to remove wax, grease, or previous coatings. Ensure the surface is completely dry and contaminant-free.
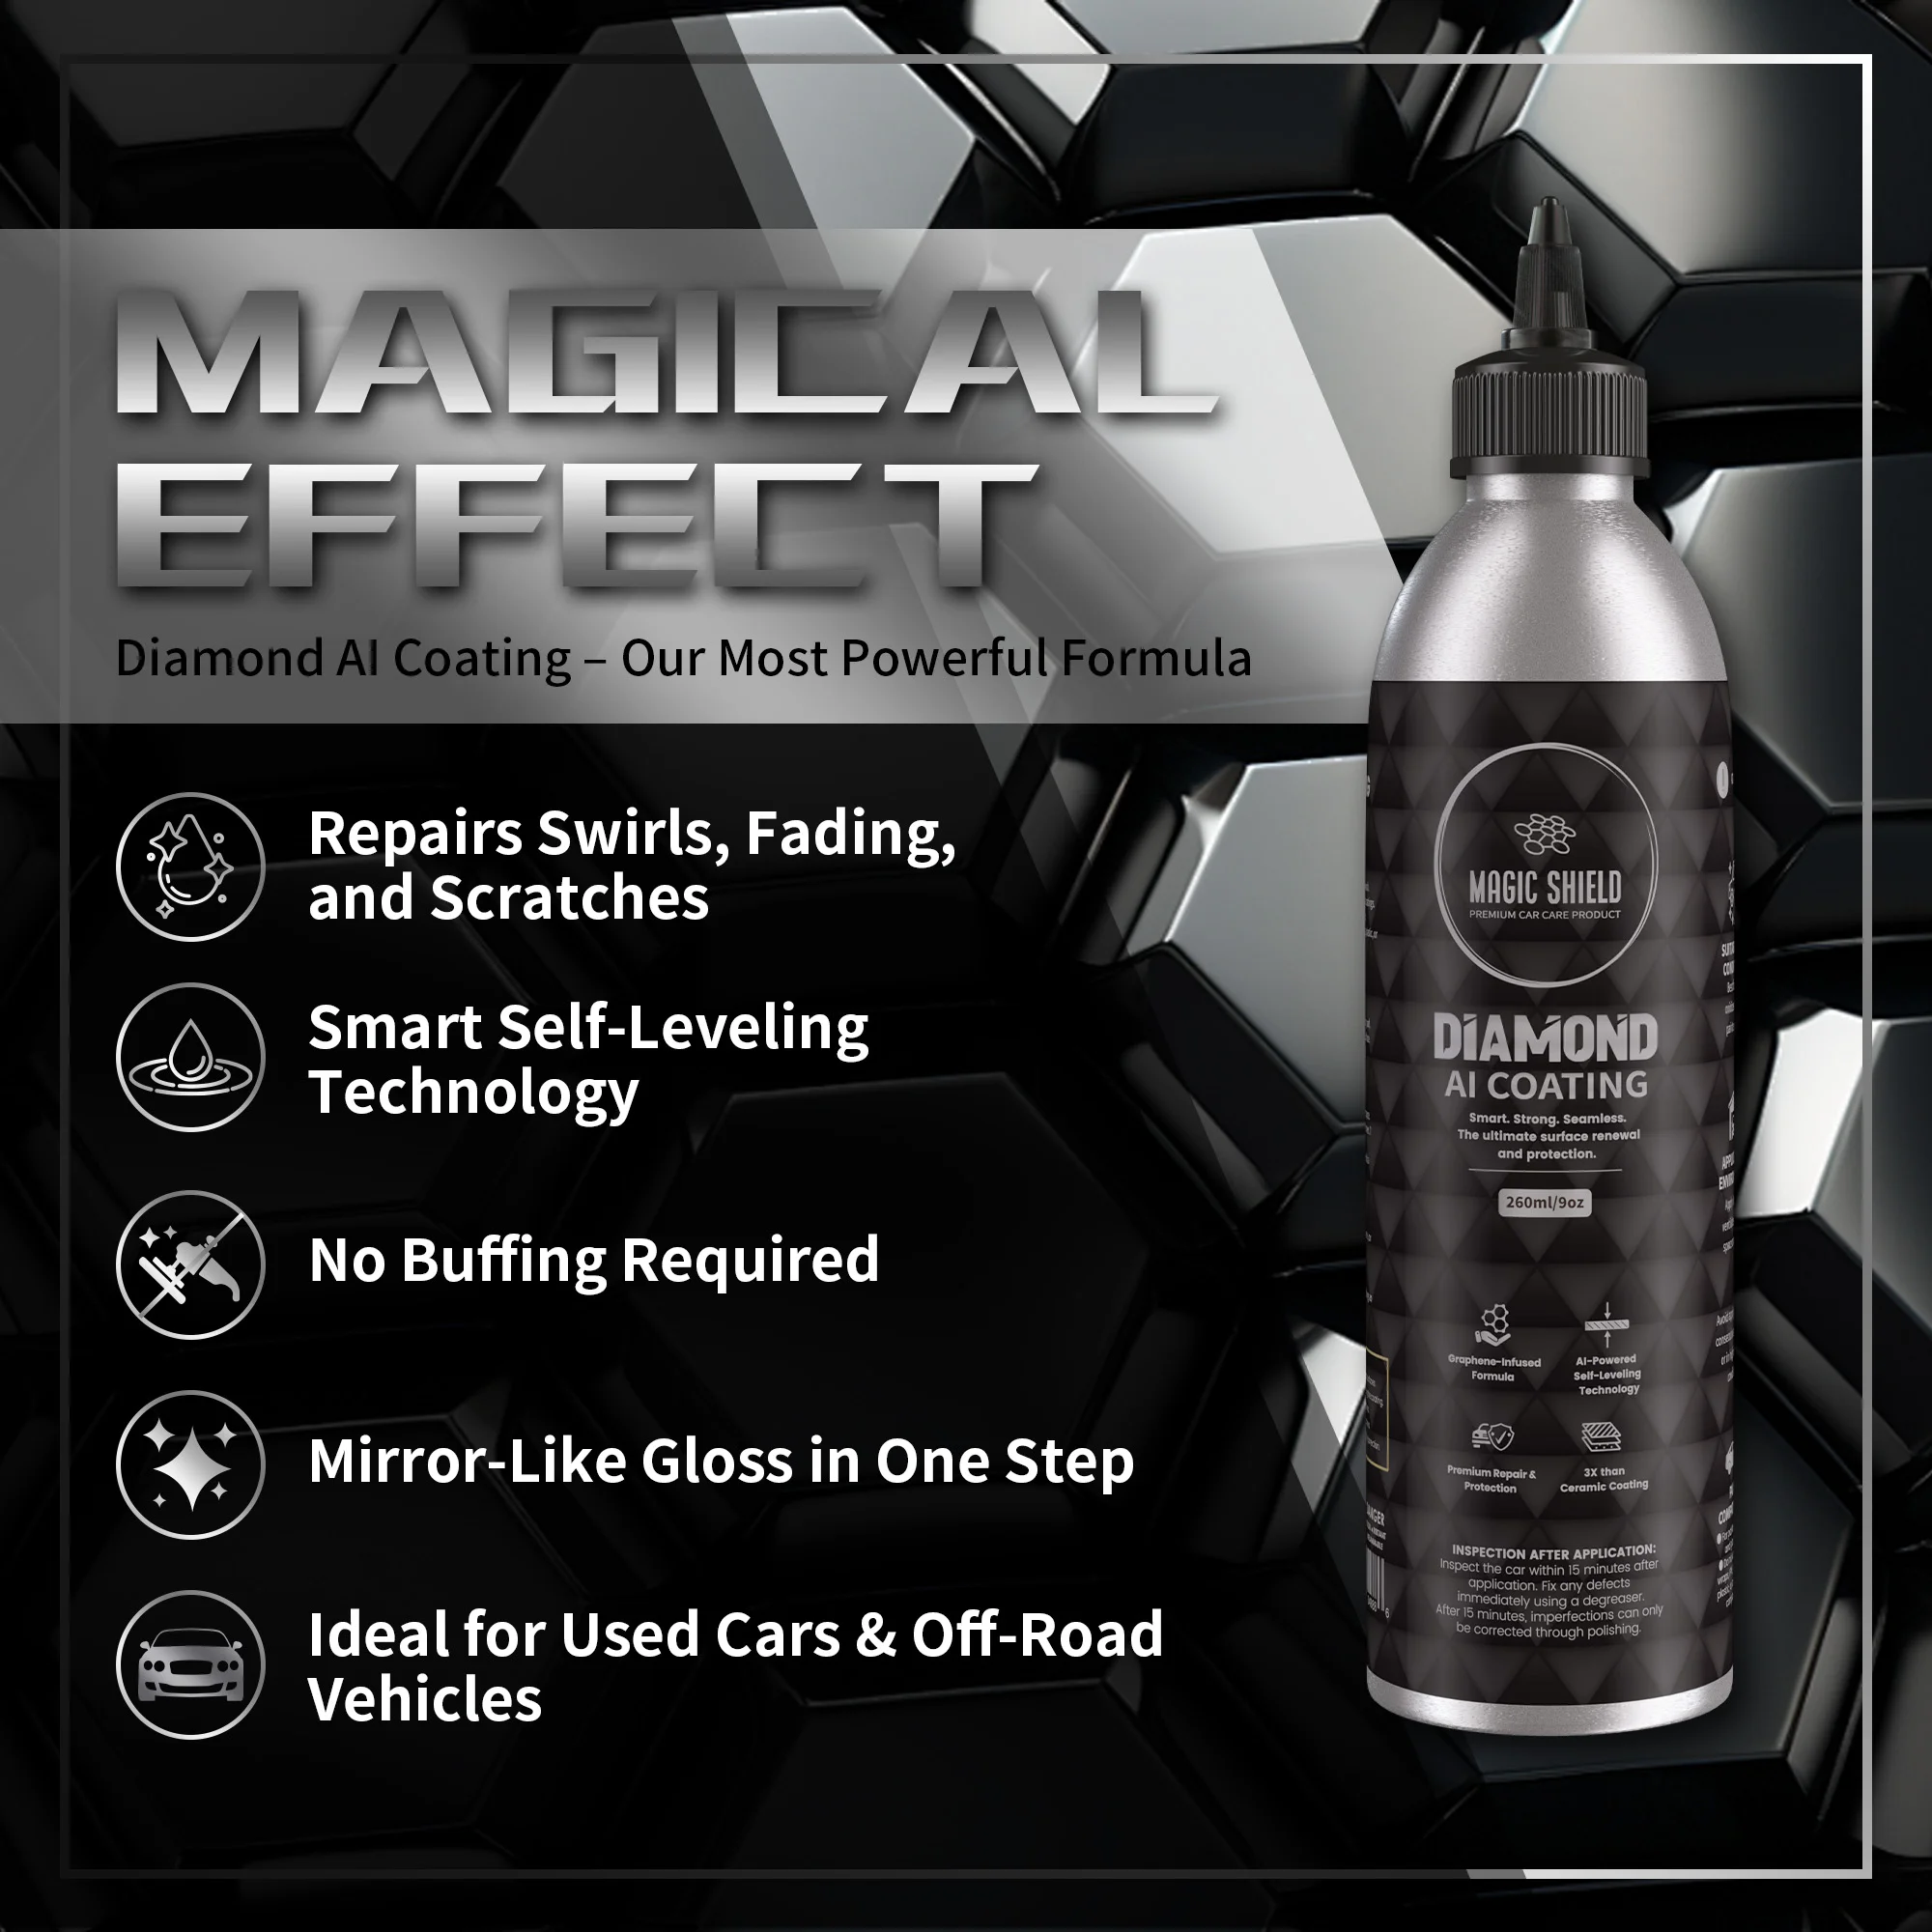
Apply only to painted surfaces or headlight plastic. Do not apply on the front windshield for safety reasons. Formulated for maximum performance on paint and headlight surfaces.
APPLICATION
Shake bottle before use.
Fully saturate applicator cloth with 80–100 drops before first use.
Apply in a single straight direction, 5–10% overlap.
After initial application, add 10–15 drops for each new panel.
No buffing required — coating will self-level.
CURING
Cure for 2 hours in a garage/enclosed space.
Imperfections can be fixed within 15 minutes with prep spray.
Avoid water exposure for the following durations:
4 days in summer
7 days in winter
If water accidentally contacts the coating, gently blot it dry with a microfiber towel.
Post-Application
For enhanced durability and shine, you may apply wax, graphene, or ceramic coating 1 month after application.
Avoid washing the car for 4 days (summer) or 10 days (winter).
After curing, you can test the coating hardness by lightly scratching an inconspicuous panel with your fingernail before washing.
Tips for Best Results
This product is best and most ideal for restoring oxidized, aged, or dull paint surfaces.
If the vehicle has been repainted, ensure a minimum of 8 months before applying the coating.
Do not apply during consecutive rainy days or in highly humid conditions.
Inspection After Application
Inspect the car within 15 minutes after application.
Fix any defects immediately using a degreaser.
After 2 hours, imperfections can only be corrected through polishing.


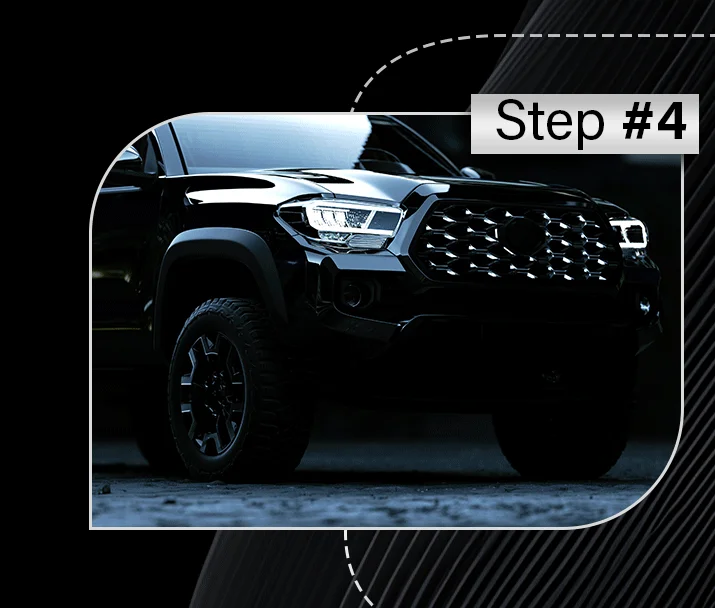
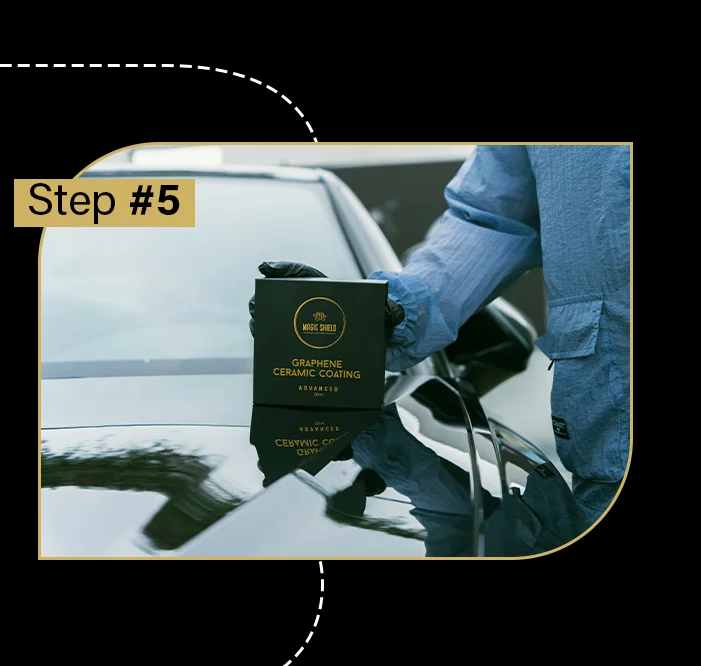
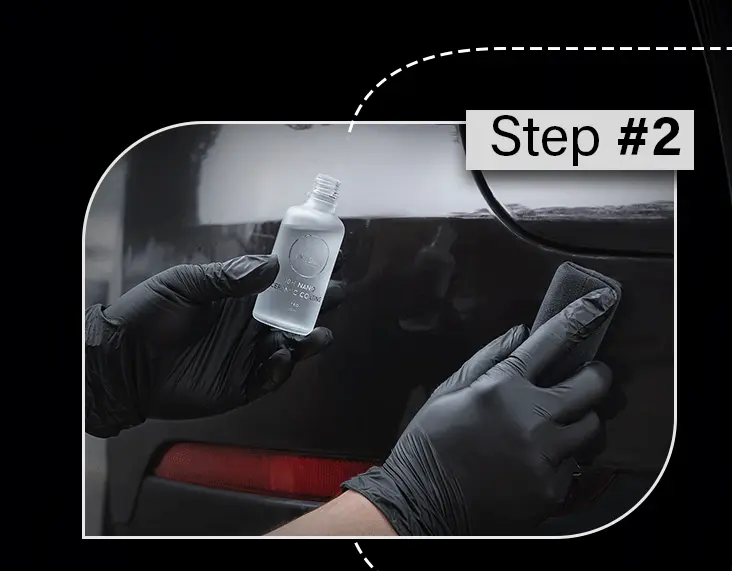
Before You Begin
Park your car in a shaded, dust-free area with a surface temperature between 15°C and 24°C (60°F–75°F).
Prepare the vehicle by thoroughly washing it and removing all previous wax, grease, and contaminants using Magic Shield Prep Spray.
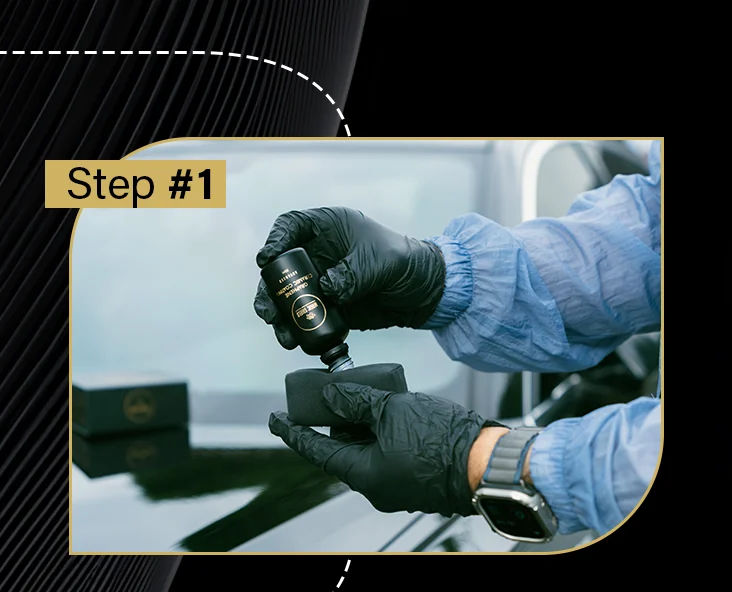
Prepare the Applicator
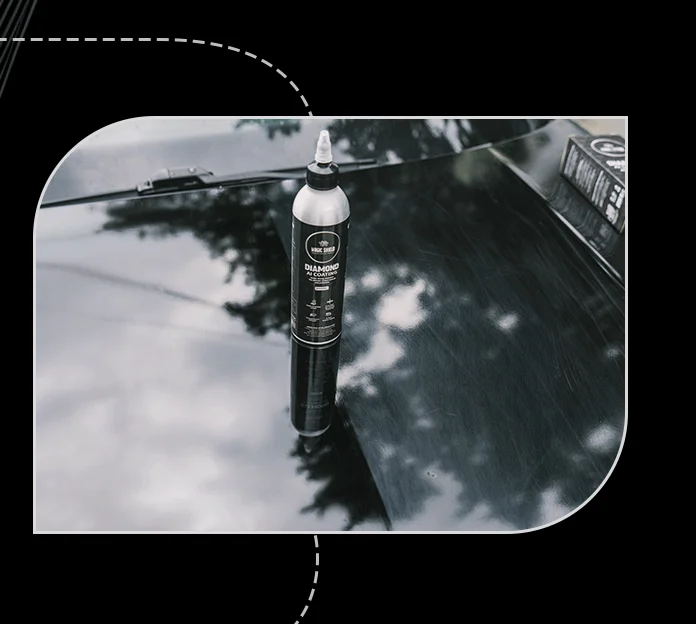
Shake the coating bottle vigorously.
Replace the bottle cap with the white tip included in the package.
Apply 6–10 drops of the coating onto the suede applicator pad.
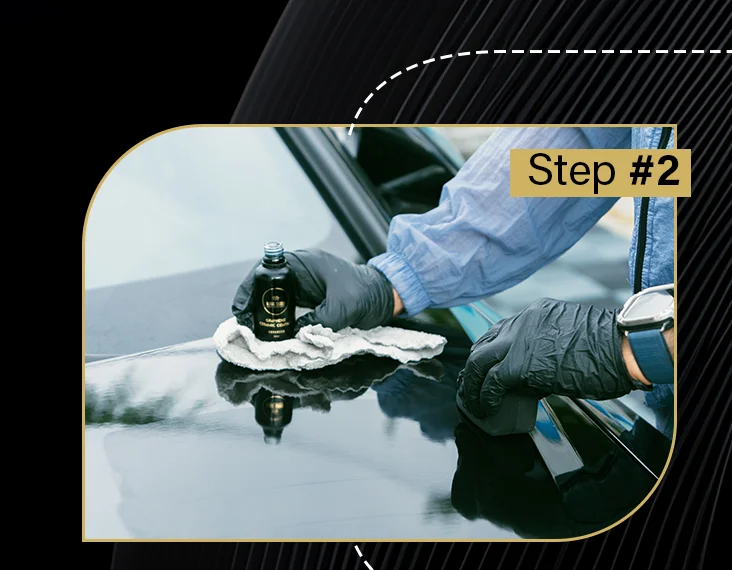
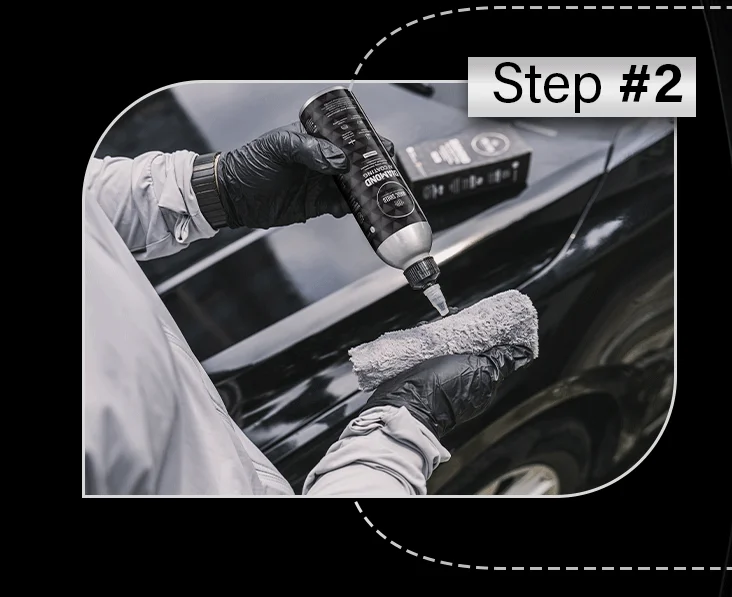
Apply the Coating
sing the applicator, swipe in straight, overlapping lines (side-to-side or up-and-down) on one section of the vehicle at a time.
Keep the suede applicator pad moist by adding a few drops of coating every 2–3 swipes to ensure even application.
Allow to Flash
Let the coating sit for 3–5 minutes depending on the temperature:
15°C (60°F): 5 minutes
20°C–25°C (70°F–80°F): 3 minutes
Look for a light rainbow haze (“flashing”) to appear on the surface.
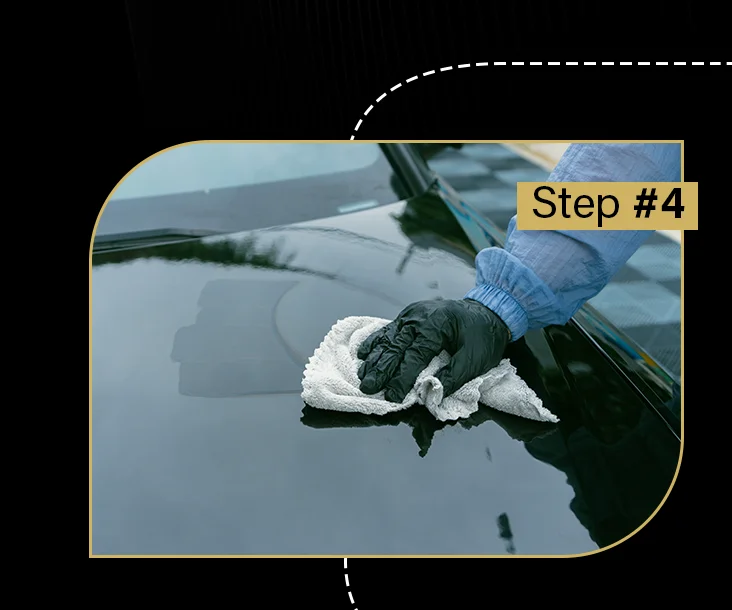
Buff the Surface
Use a clean microfiber towel to buff away the rainbow haze.
Work quickly and thoroughly to avoid excessive haziness.
Inspect each panel from multiple angles to ensure even and smooth coverage.
Allow the Coating to Cure
Initial Curing: Keep the vehicle in a moisture-free, temperature-controlled environment for at least 8 hours.
Full Curing: Allow the coating to cure indoors for 36 hours before exposing the vehicle to the elements.
During this time, avoid water, debris, or physical contact with the surface.
Tips for Best Results
Always work in a well-ventilated area.
Use clean and dry microfiber towels to prevent scratches.
Avoid applying the coating to hot surfaces or under direct sunlight.

Before You Begin
Park your car in a shaded, dust-free area with a surface temperature between 15°C and 24°C (60°F–75°F).
Prepare the vehicle by thoroughly washing it and removing all previous wax, grease, and contaminants using Magic Shield Prep Spray.
Prepare the Applicator
Shake the coating bottle vigorously.
Replace the bottle cap with the white tip included in the package.
Apply 6–10 drops of the coating onto the suede applicator pad.
Apply the Coating
sing the applicator, swipe in straight, overlapping lines (side-to-side or up-and-down) on one section of the vehicle at a time.
Keep the suede applicator pad moist by adding a few drops of coating every 2–3 swipes to ensure even application.
Allow to Flash
Let the coating sit for 3–5 minutes depending on the temperature:
15°C (60°F): 5 minutes
20°C–25°C (70°F–80°F): 3 minutes
Look for a light rainbow haze (“flashing”) to appear on the surface.
Buff the Surface
Use a clean microfiber towel to buff away the rainbow haze.
Work quickly and thoroughly to avoid excessive haziness.
Inspect each panel from multiple angles to ensure even and smooth coverage.
Allow the Coating to Cure
Initial Curing: Keep the vehicle in a moisture-free, temperature-controlled environment for at least 8 hours.
Full Curing: Allow the coating to cure indoors for 36 hours before exposing the vehicle to the elements.
During this time, avoid water, debris, or physical contact with the surface.
Tips for Best Results
Always work in a well-ventilated area.
Use clean and dry microfiber towels to prevent scratches.
Avoid applying the coating to hot surfaces or under direct sunlight.

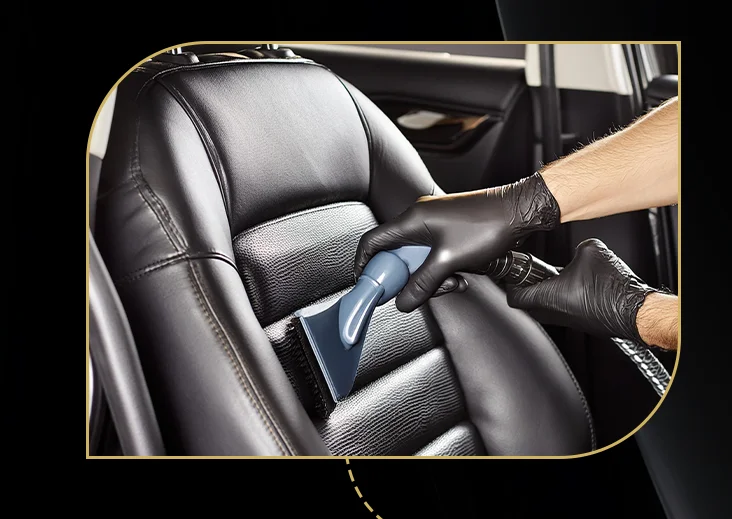
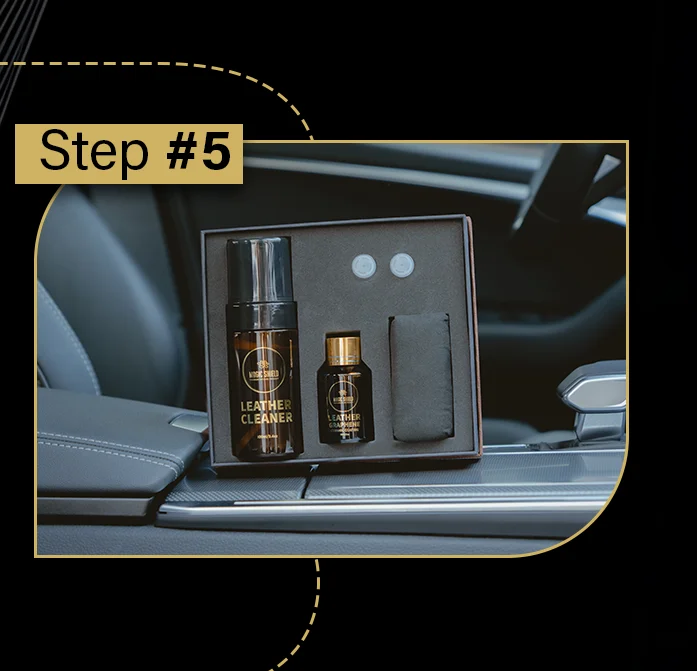
Before You Begin
Prepare Your Vehicle Interior:
Thoroughly vacuum the interior to remove dust and debris.
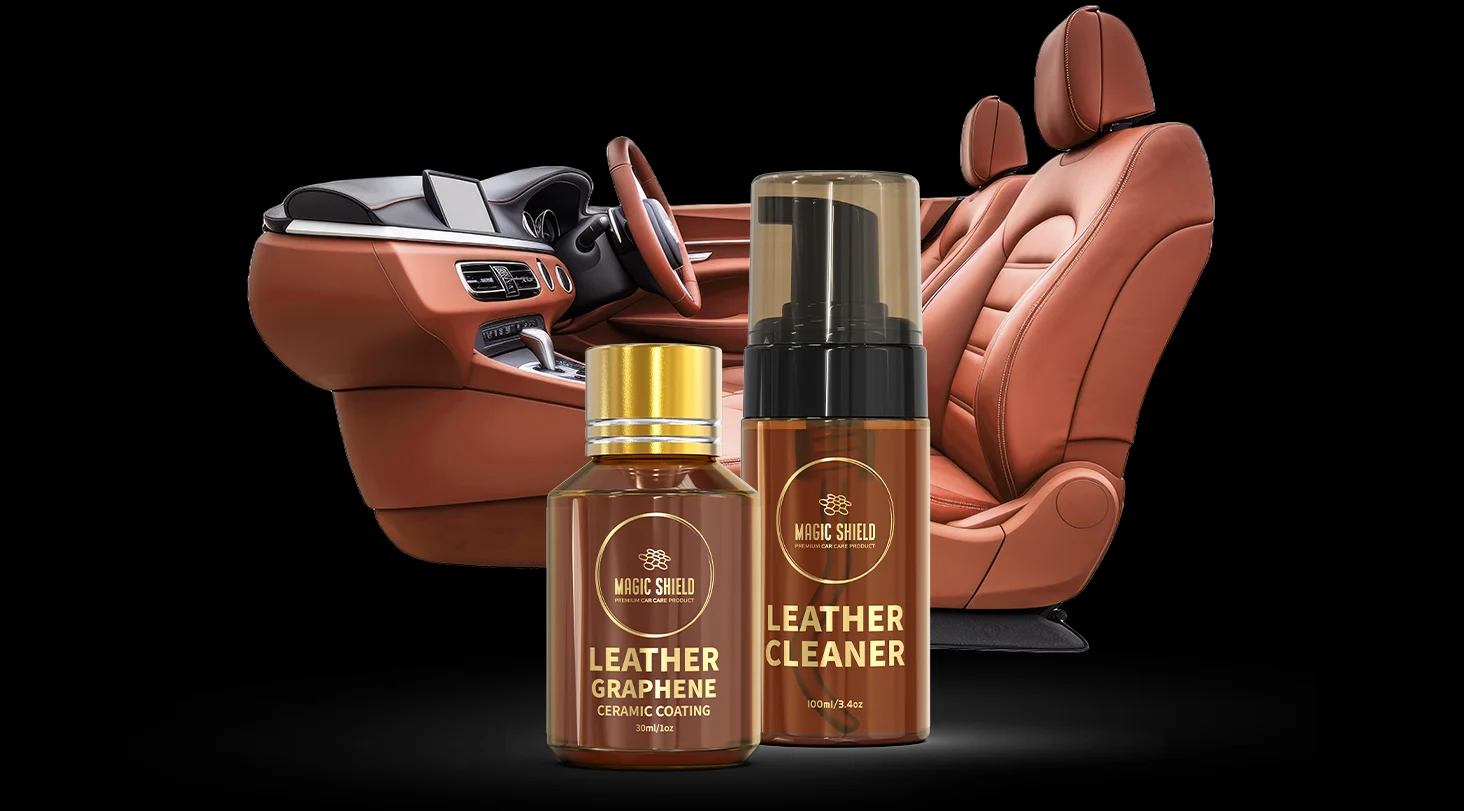
Clean all leather surfaces using Magic Shield Leather Cleaner to eliminate dirt, oils, and contaminants.
Prepare the Environment:
Park your car in a shaded, dust-free area with a temperature between 15°C and 24°C (60°F–75°F).
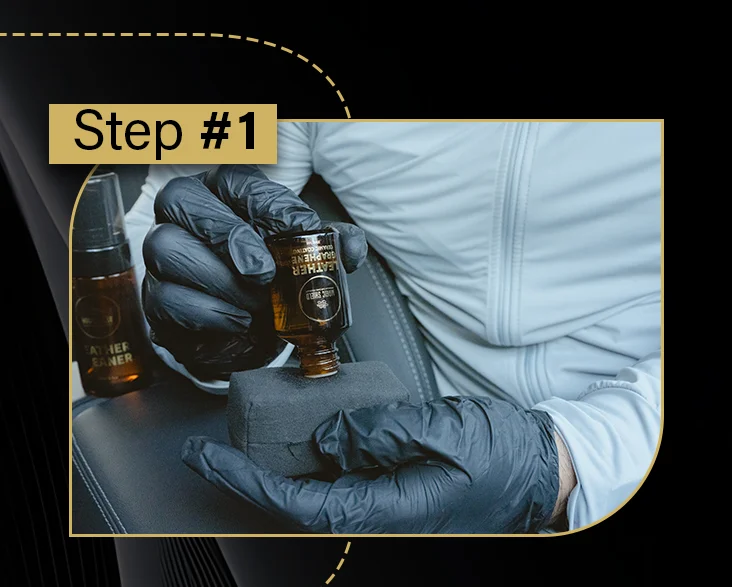
Prepare the Leather Coating
Shake the leather coating bottle thoroughly to ensure the formula is evenly mixed.
Replace the bottle cap with the included white tip for controlled application.
Apply 8–10 drops of the coating onto the suede applicator pad.
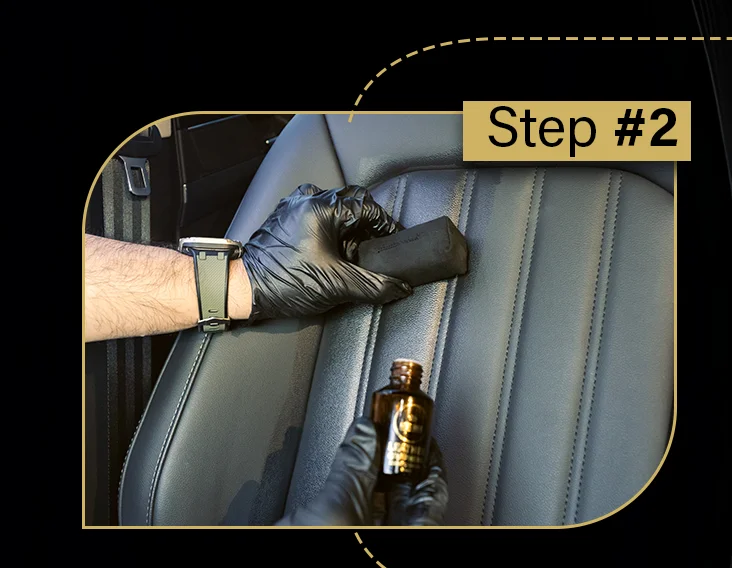
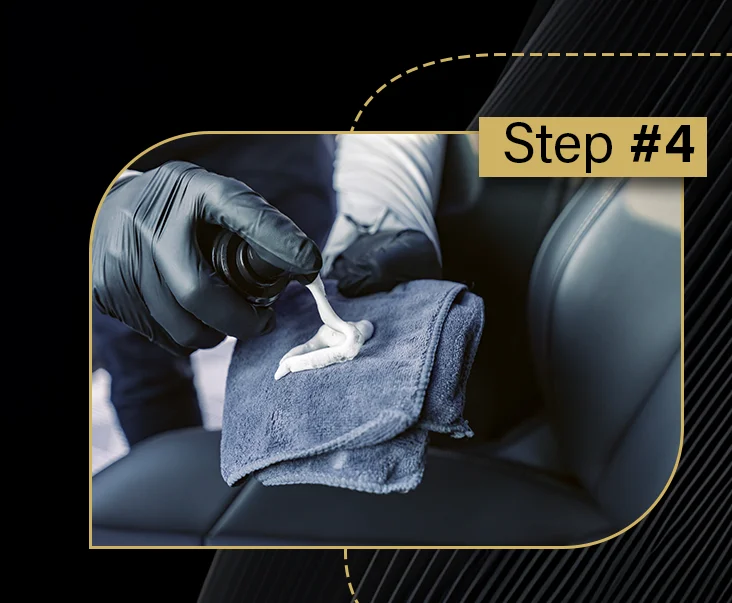
Apply the Leather Coating
Application Technique: Swipe the applicator pad in straight, overlapping lines (side-to-side or up-and-down) on one section of the leather at a time.
Keep Moisture Consistent: Add a few drops of coating to the suede applicator pad every 2–3 swipes to ensure even application.
Wait Before Buffing
Allow the coating to settle for 3–5 minutes before proceeding to buff.
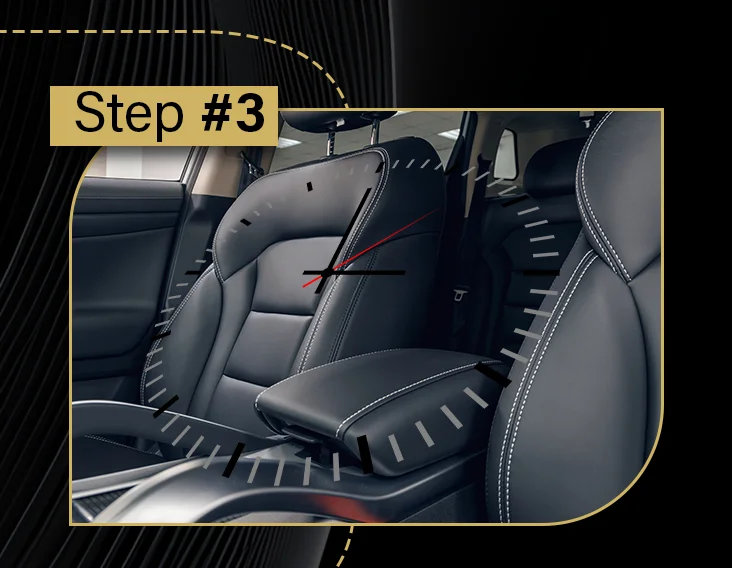
Buff the Surface
Remove Excess Product: Use a clean, dry microfiber cloth to gently buff the leather.
Technique: Use light, circular motions to achieve a streak-free, smooth finish.
Inspect Thoroughly: Check for high spots or uneven areas and buff as needed.
Allow the Coating to Cure
Initial Curing: Let the coating sit undisturbed in a temperature-controlled environment for at least 4 hours.
Full Curing: Avoid water, debris, or physical contact with the surface for a full 24 hours to ensure proper bonding.
Reapply if Necessary: If high spots are visible after curing, correct them by lightly reapplying and buffing the area within 2 hours.
Tips for Best Results
Always work in a well-ventilated area.
Use clean and dry microfiber towels to prevent scratches or streaks.
Avoid applying the coating on hot surfaces or in direct sunlight.
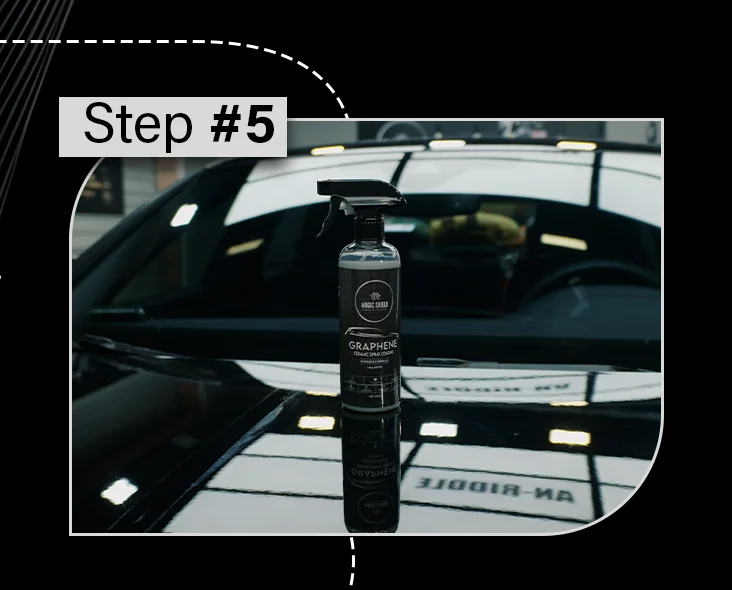
Before You Begin
Park your car in a shaded, dust-free area with a surface temperature between 15°C and 24°C (60°F–75°F).
Prepare the vehicle by thoroughly washing it and removing all previous wax, grease, and contaminants. This can work as a booster if you have already graphene or ceramic coating.
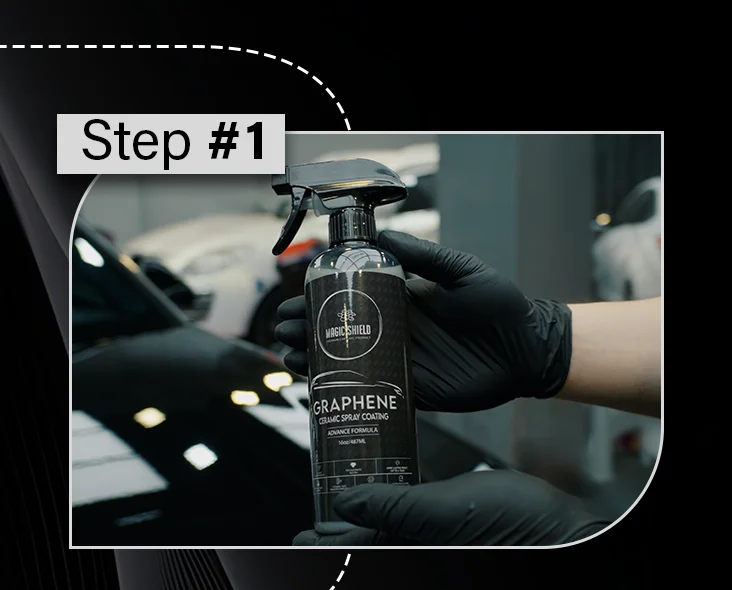
Prepare the Applicator
Shake the bottle of Graphene Spray well to ensure the formula is evenly blended.
Ensure the surface is cool to the touch before starting.
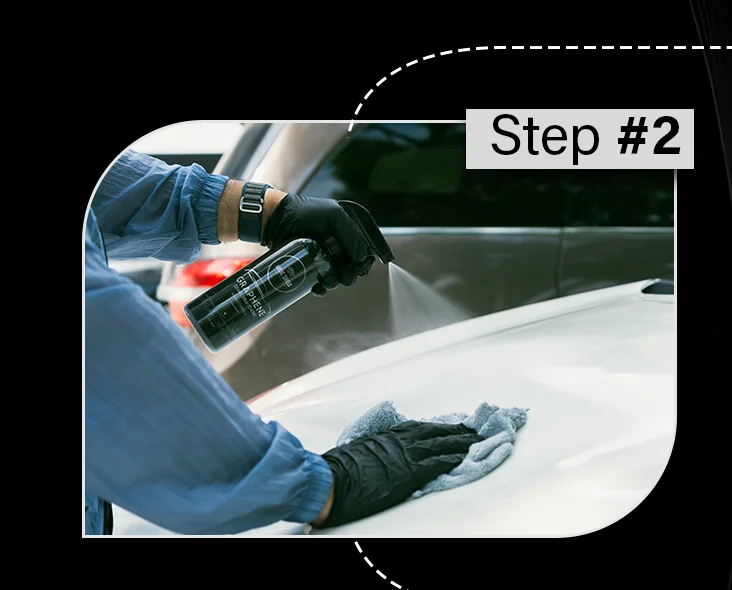
Apply the Graphene Spray
Hold the bottle 6–8 inches away from the surface and spray a light, even coat on the target area.
Work in Sections: Focus on small sections (e.g., half a hood or one door panel) to ensure thorough coverage and ease of buffing.
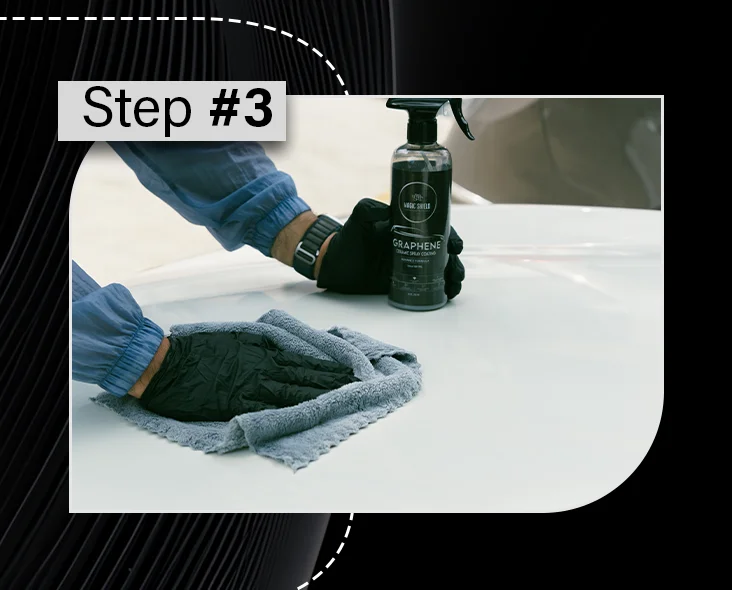
Buff the Surface
60 sec to buff off or if you see the haze.
Work quickly and thoroughly to avoid excessive haziness.
Inspect each panel from multiple angles to ensure even and smooth coverage.
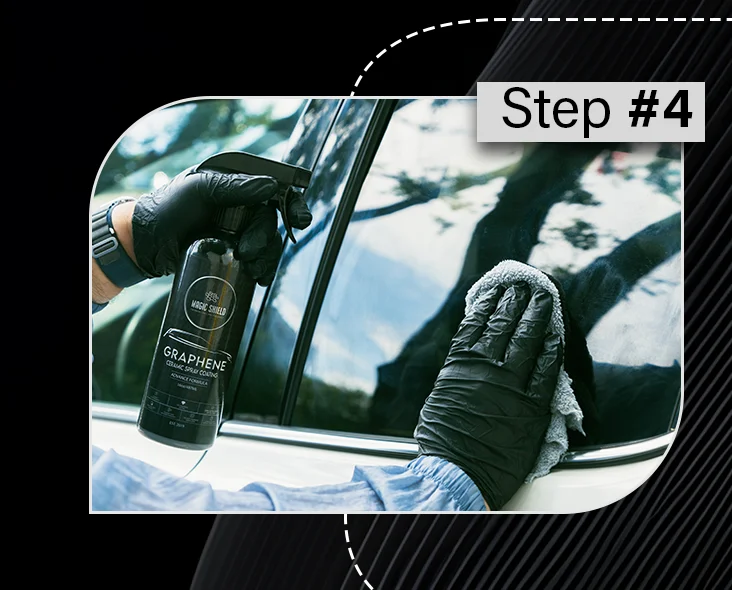
Repeat Section by Section
Work Methodically: Continue spraying, spreading, and buffing section by section until the entire vehicle is coated.
This ensures even application and prevents the spray from drying prematurely.
Allow to Cure
Initial Curing: Keep the vehicle in a moisture-free area. 4 hours control temp/indoor and 24 hours avoid water.
Full Curing: Allow the coating to cure indoors for 36 hours before exposing the vehicle to the elements.
During this time, avoid water, debris, or physical contact with the surface.
Best Results
Always work in a well-ventilated area.
Use clean and dry microfiber towels to prevent scratches.
Avoid applying the coating to hot surfaces or under direct sunlight.